Please Note: If students have not logged into Scholastic within the last week, they may be prompted to log in. Students in MAES, BES, and NBCS should start by clicking on the Scholastic Digital Manager button on the left side bar first to connect to the Course. Then they can click on the direct link in the Schoology materials. MVMS and GHS students will need to enter the Scholastic Class Code you created to access the content. I recommend posting this somewhere in Schoology or add it to the Schoology Assignment Description.
If you would like to add a link to a specific article or activity to your Schoology Course, please follow these directions:


1. MAES, BES, and NBCS teachers, please click the Scholastic Digital Manager button on the left side bar to access your Scholastic Materials. MVMS and GHS teachers, please click the Scholastic Magazines button.
2. Once in your account and viewing the Dashboard, click into the desired Scholastic Resource.
3. Locate the article or activity you wish to link directly to.
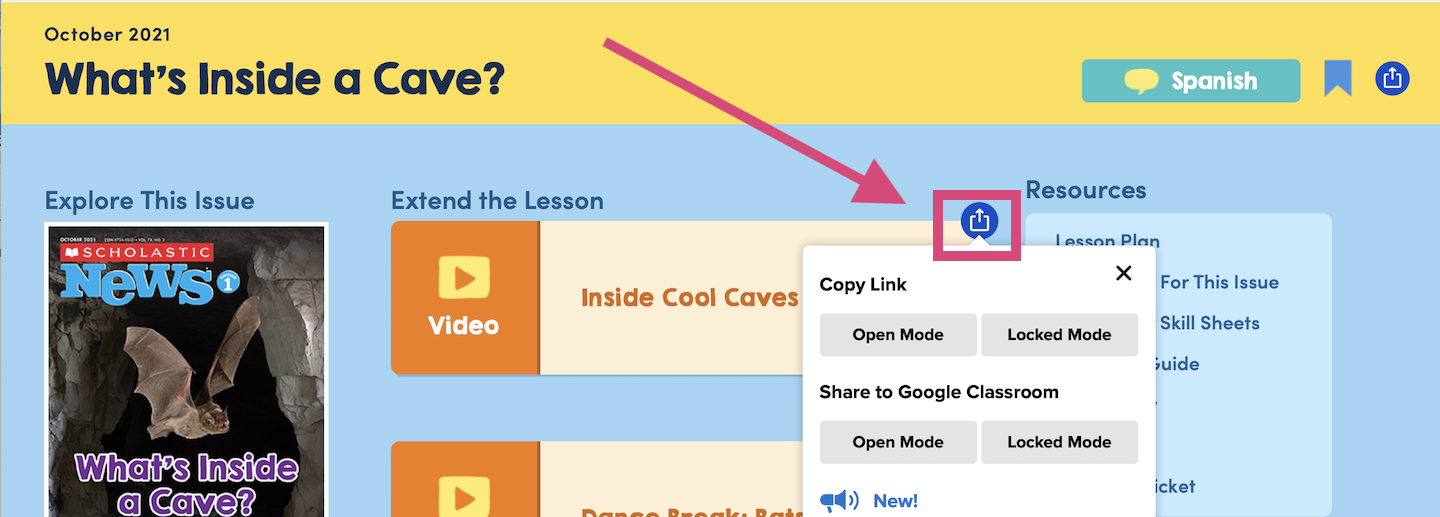
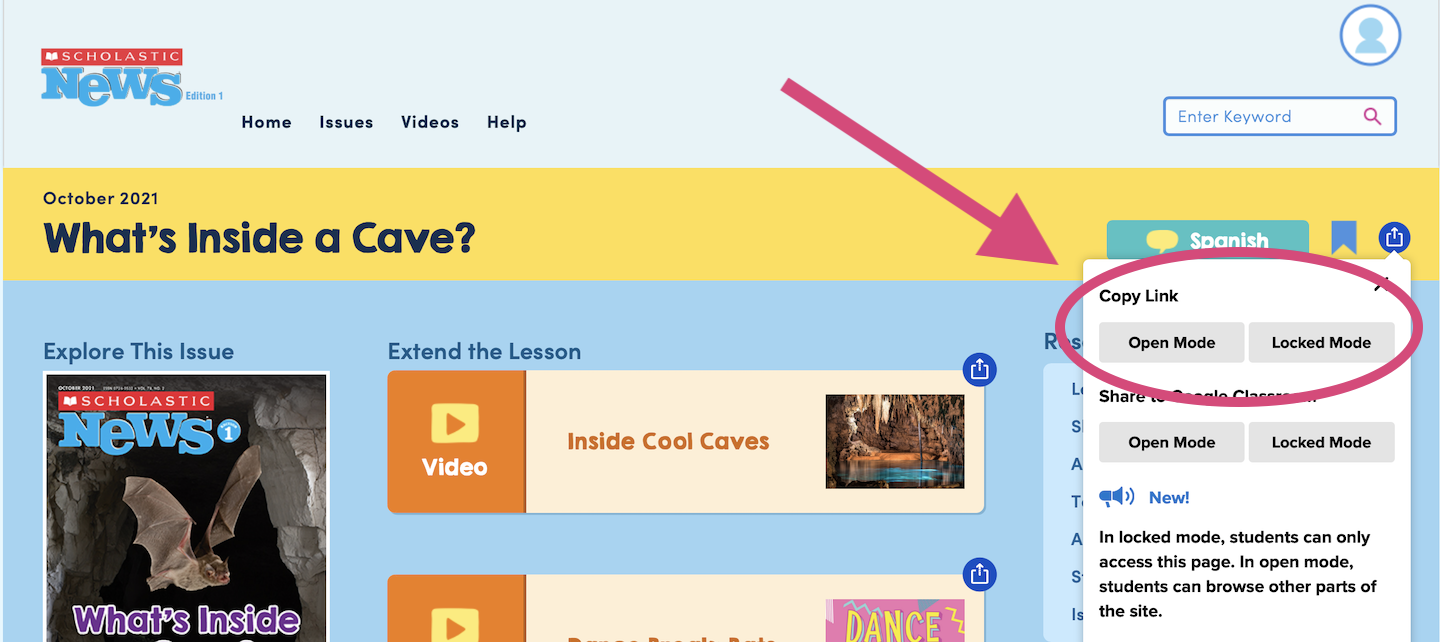
4. Click on the Share icon.
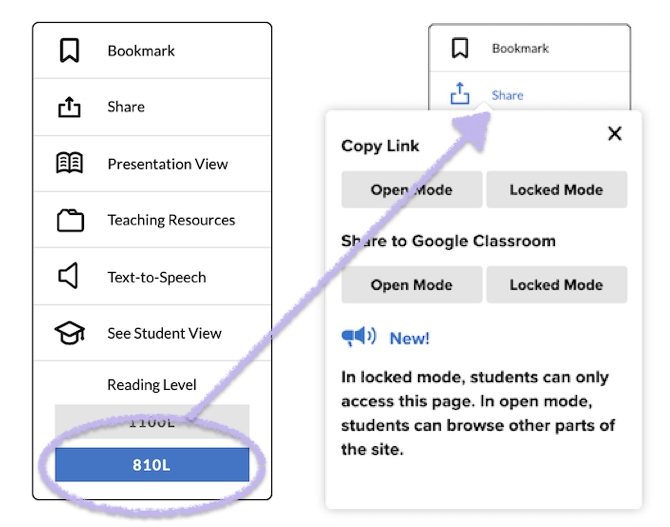
5. Click on either select Open Mode or Locked Mode to copy the link. In Locked Mode, students can only open that specific article, page, or resource. In Open Mode, students can access other parts of the site.
The share button may look different, or place located in different places depending on the Scholastic resource you subscribe to.
In a Schoology Course, you can add the link as a materials link or attached to a Schoology assignment.
To add as a Material Link:
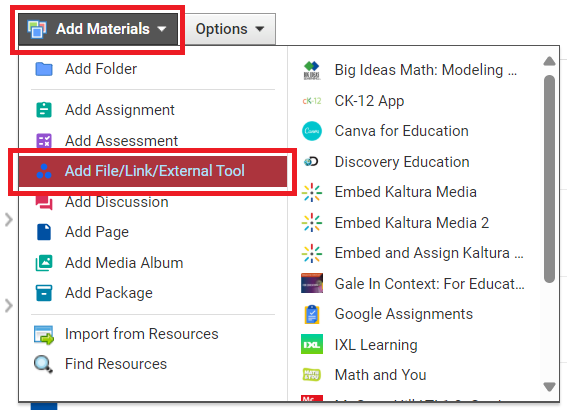
1. While on the Materials tab, click Add Materials and then select Add File/Link/External Tool from the drop-down menu.
2. Click Link.
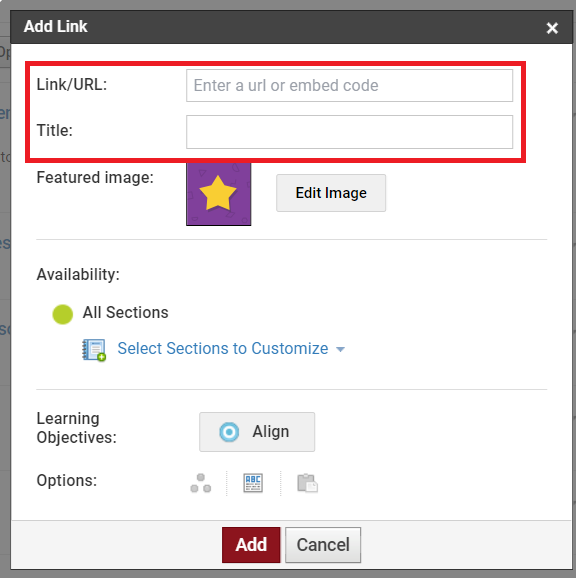
3. Paste the Link and a Title and fill out all other applicable information.
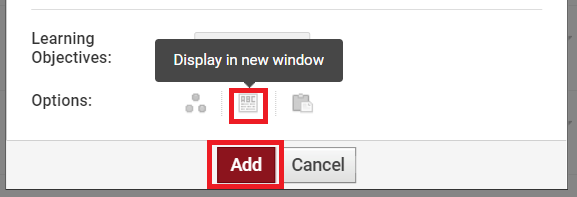
4. Click on the ABC icon to change the setting to allow the link to open in a new window. Then click Add.
To attach to a Schoology Assignment:
1. While on the Materials tab, click Add Materials and then select Add Assignment from the drop-down menu.
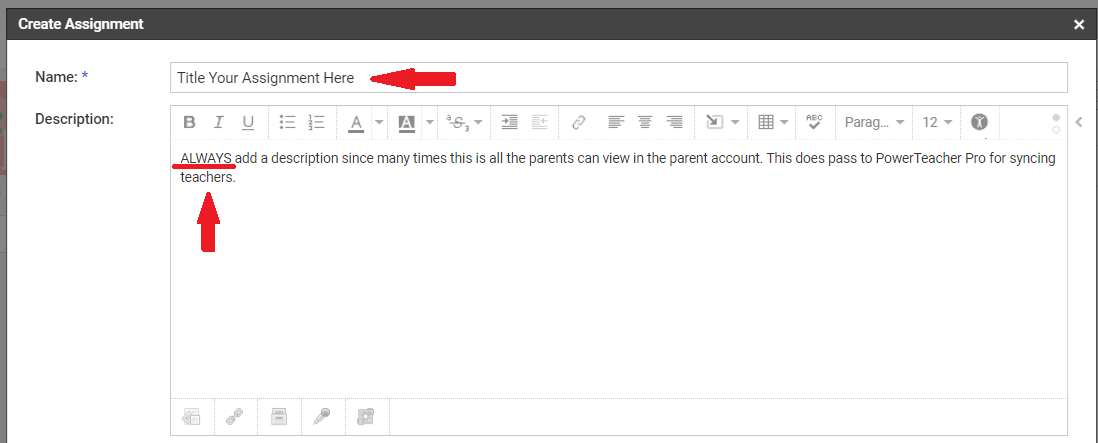
2. Add a Title AND Description for your assignment. The Description is extremely important since this will briefly describe the task to the students, as well as the parents. This description will pass to PowerTeacher Pro if you are a syncing teacher.
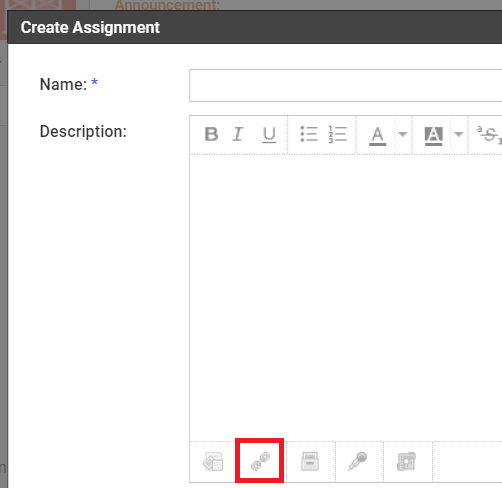
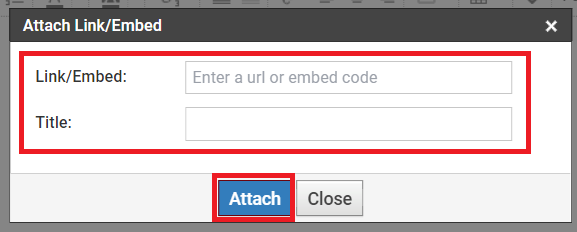
3. Click the link icon to attach the link to the assignment.
4. Paste the link from Scholastic in the first field and then add a title for the link in the second field. Then click Attach.
5. If you want the assignment to ONLY be marked as collected, check the box next to Collected. If not, be sure to add a point value. Then select a Category. Elementary teachers can mark the assignment as Ungraded.
6. If you are a teacher that syncs to PowerTeacher Pro, keep the Syncing set to Sync to SIS. If you DO NOT sync to PowerTeacher Pro, uncheck the Sync to SIS box.
7. Add a Due Date.
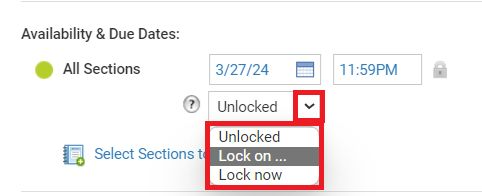
8. To Lock the ability to digitally submit an assignment on/after a specific date (which will remove it from the student's overdue list on that date), click on the lock icon and select when to lock it on. In Linked Sections, this will be located next to the Due Date. If you are not using Linked Sections, this will be located at the bottom of the assignment setup screen. Then select when you want to the assignment to lock. This is important to set up if you are not syncing grades to PowerTeacher Pro. The other option is to disable digital submissions.
9. If you are using linked sections, you can customize the Publish Status or Due Date for an assignment. Click the drop-down menu for Select Sections to Customize and click the section to customize. Then select a Due Date. If the circle is green, the assignment will be published immediately. If it is white, it will be unpublished until you publish it.
10. If students will not be submitted the assignment digitally, click on the Submissions Enabled/Disable (file box icon) to disable the assignment. This will gray out the icon.
11. ALWAYS remember to click on the Comments Enabled/Disabled (word bubble icon) to disable the ability for students on comment on the assignment setup itself.
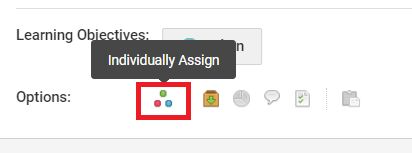
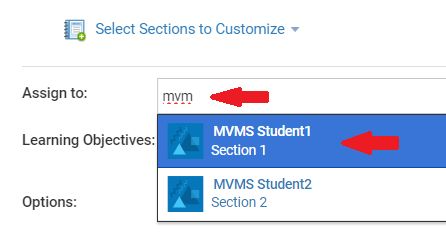
12. To individually assign the material, click on Individually Assign (icon with 3 dots, shaped like a triangle). Once the individually assign field box appears, type in the name of a student or grading group. Once it auto-populates, click on the correct student or Grading Group to add it. Then add any additional students or Grading Groups.
If you are using Linked Sections, there is an additional step you need to take. Please click this link and scroll to the directions regarding Linked Sections: SAU19 Knowledge Base - Individually Assigning Materials.
For more information on setting up Grading Groups, please click this link: SAU19 Knowledge Base - Adding a Grading Group to Assign Materials to Groups of Students.
13. Click Create.
