SAU #19 uses SharePoint to share important documents and support collaboration across the district. All staff members have access to the SAU #19 HUB and their school’s SharePoint site. SharePoint site owners can manage access to the entire site as well as control or restrict access to specific folders and files. Follow the directions below to manage SharePoint access and permissions:
SharePoint Permission Levels
Owner: Has full access to the SharePoint site and its contents. Owners can edit the site and documents, add or remove members, change permission levels, and manage restrict access to specific folders and files.
Member: Can view the SharePoint site and create or edit documents within the site. Members do not have permission to manage the site itself or change site-level access.
Visitor: Can view the SharePoint site and its contents but cannot make changes to the site, folders, or files. Visitor access is read-only.
Please Note: Most SAU #19 SharePoint sites do not use the Visitor permission level and are limited to Owners and Members.
Adding Members
1. Click into the SharePoint site you want to add a member into.
2. Click # Members in the upper right-hand corner of the SharePoint site.
3. Click Add Members.
4. Begin typing the name of the member you want to add. When their name appears in the list, click on it to select them.
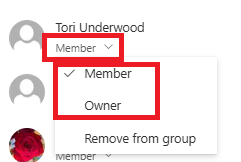
5. After the new member is listed under # member to be added, click the permission drop-down menu to select whether to grant them the Member or Owner permission level.
6. Add any additional members you need to add, by entering their name in the Add members field and follow the steps above.
7. Once all new members are listed and the site-level access it set, click Save.
Removing Members
1. Click into the SharePoint site you want to add a member into.
2. Click # Members in the upper right-hand corner of the SharePoint site.
4. Click the permission drop-down menu and select Remove from group. Clicking Remove from group will instantly remove the member from the group.
5. Repeat the steps above for any members you need to remove from the SharePoint site.
Managing User Access Levels
1. Click into the SharePoint site you want to add a member into.
2. Click # Members in the upper right-hand corner of the SharePoint site.
3. Click the permission drop-down menu and select the permission level you want to grant them. The member’s access level will be updated immediately.
Restricting Access to Specific Folders or Files
Please Note: If you restrict access to a folder, change the color of the folder to red to clearly indicate that the folder has restricted access.
1. Navigate to the SharePoint site where you want to restrict access to a specific folder or file.
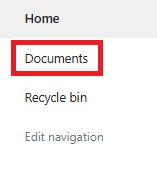
2. Click on Documents on the left side menu.
Please Note: You must select Documents before managing access. If you do not, the Manage Access option will not appear in the drop-down menu.
3. Navigate to the folder or file you want to manage access for. Click the ellipsis
(…) next to the folder or file, then select Manage Access.
4. Start by clicking on the Groups tab.
5. Click on the permission next to Members.
6. Change the permission setting to what is desired for all site members. If you do not want all member to have access to the site than select No Direct Access. Then click Apply. Make any necessary permission changes for site owners as well.
7. Click the People tab to restrict access to specific users, then click Start sharing.
8. Begin typing the name of a user you want to grant access to. When their name appears in the list, click it to add them.
9. Click the permission drop-down menu to select the permission you want to grant.
You can also update permissions for users who were previously granted access. Click the permission drop-down menu next to the user's name. Then, click the Direct Access drop-down menu and select the new permission level you want to assign. Click Apply to save the changes.
10. Repeat this process for each user you want to grant access to. If desired, enter a message for the users you added. Then click Send. Each user will receive an email notifying them that they have been granted access.
11. If you restricted access to a folder, click the ellipsis (…) next to the folder. Select Folder color, then choose red.
The folder or file will now be limited to the access and permission settings you applied.