Creating a Video Presentation in Canva
Students and educators can use Canva to create video presentations that include audio/video recordings, images, embedded links, documents, and much more. *Please note that the ability to record videos may not work in Firefox or on mobile devices due to compatibility issues. It will work in Microsoft Edge and Safari.
Please follow these directions to make a video presentation:
1. Log into Schoology and click into one of your Courses.
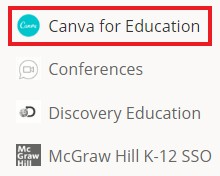
2. Click on 'Canva for Education' from the left side bar.
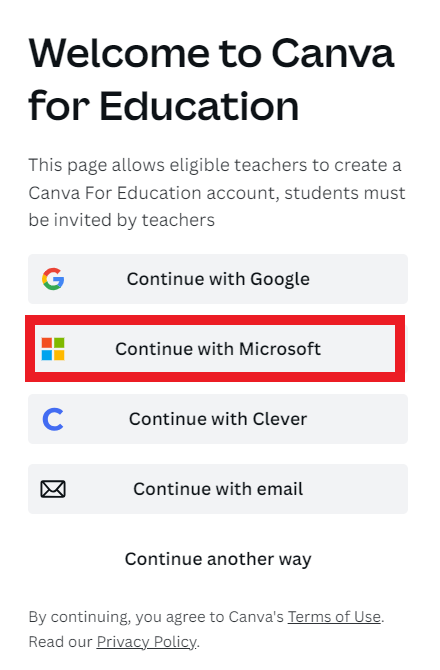
3. Click 'Continue with Microsoft'.
It should auto log you in. If it prompts you to log in, use your Office 365 username (username with @sau19.org) and your normal password. Once logged in, you can design projects in Canva.
***Students (in grades 3+) will need to create their accounts as well, following these steps. Due to the Dee Freeze on the school devices that students use, each time they want to use Canva, they will need to log into Canva through connect.sau19.org and then they can click on Canva from the left side bar or click on a Canva assignment that you created in Schoology.
4. When Canva launches, click on 'Create a design' from the upper right-hand corner.
5. Select 'Presentation' from the drop-down menu.
You will now be able to customize your presentation.
Add Additional Slides
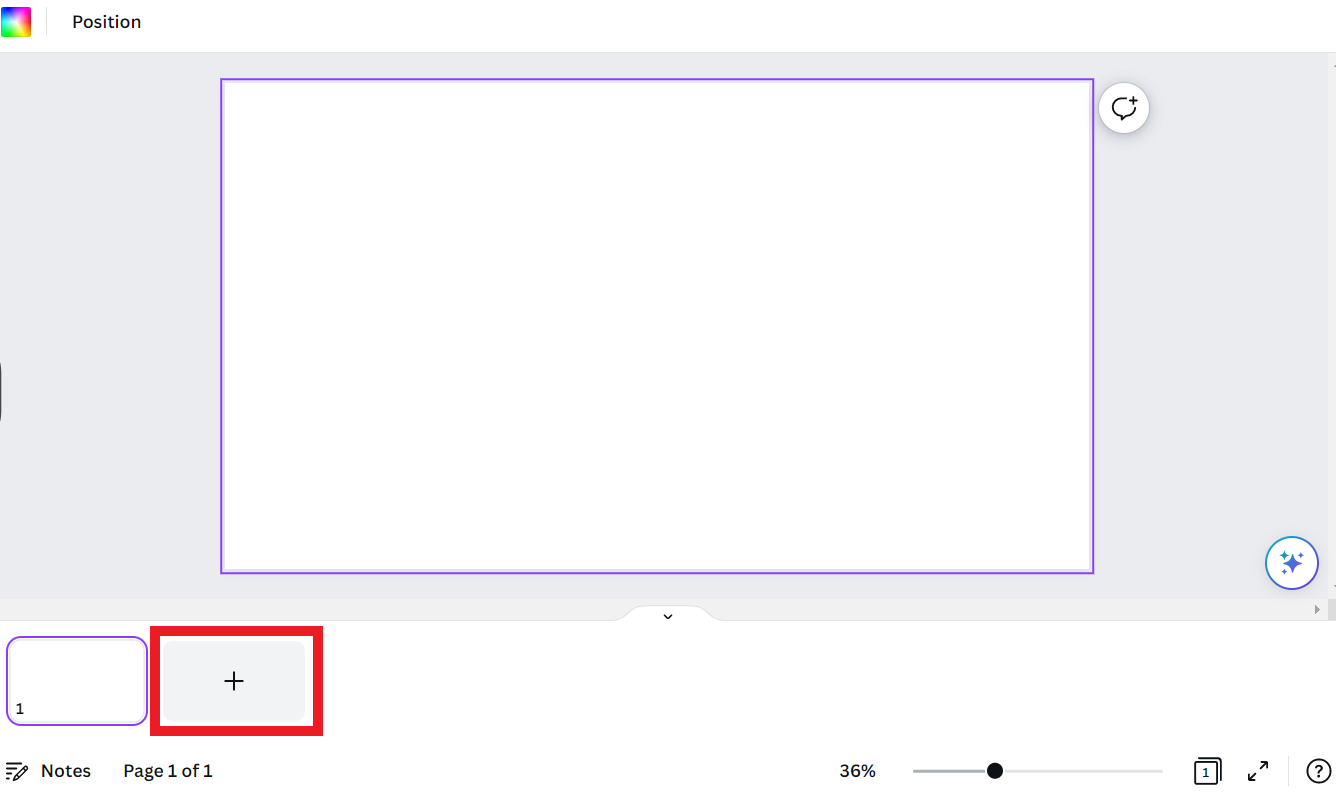
To add additional slides to your presentation, click the + icon at the bottom of the page. Repeat this for each slide you need to add.
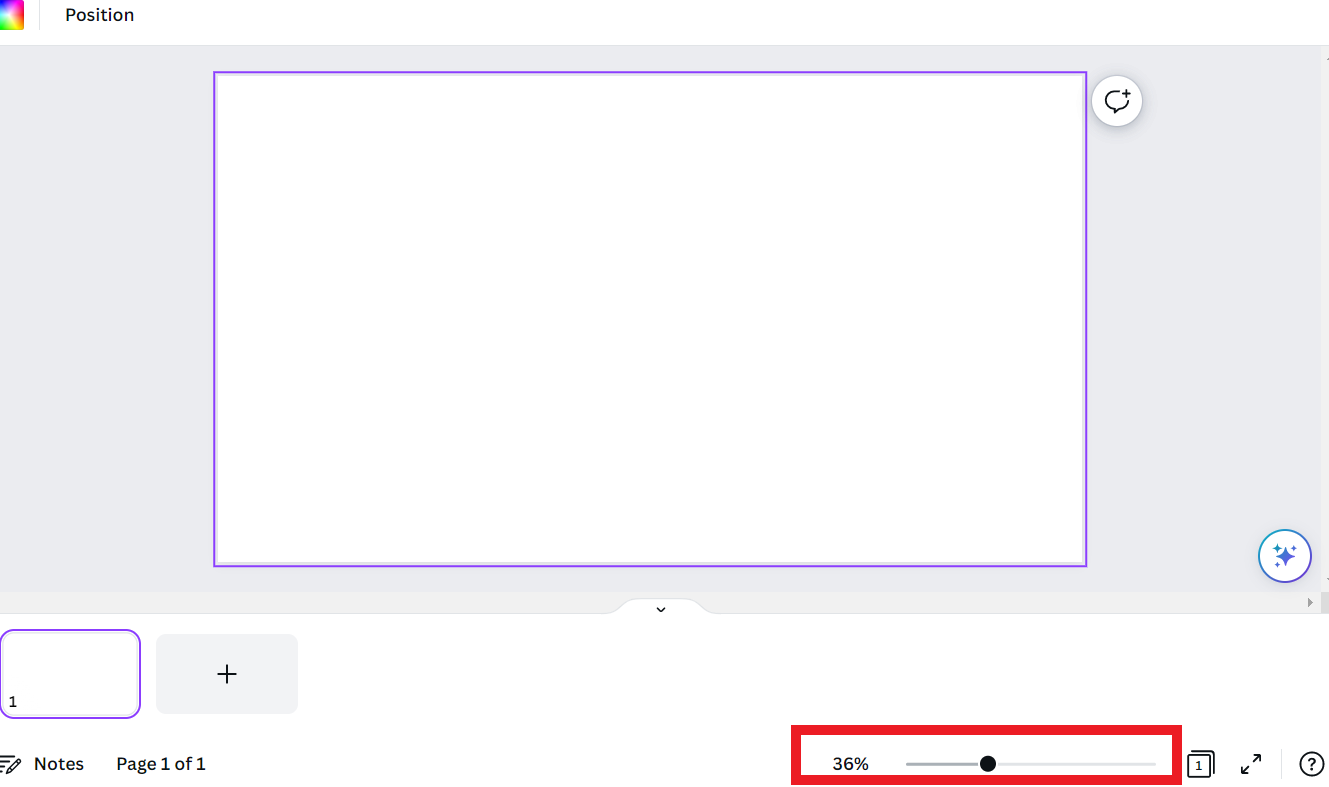
Zoom in and Out of the Presentation
To zoom in and out of the presentation, drag the slider in the bottom right-hand corner. Slide left to zoom out and right to zoom in.
Upload or Record Audio/Video Files
*Please note that the 'Record yourself' button may not show in Firefox or on mobile devices due to compatibility issues. It will work in Microsoft Edge and Safari.
1. Click on 'Uploads' from the left side bar and select either 'Upload files' or 'Record Yourself'.
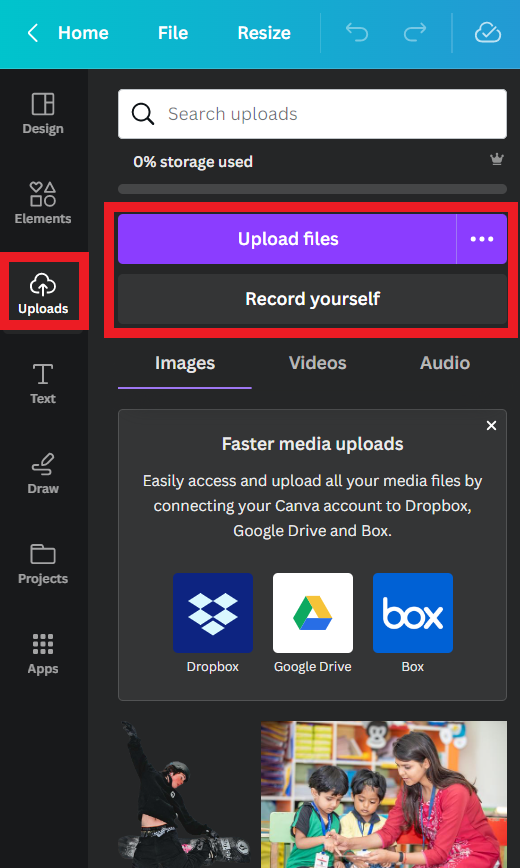
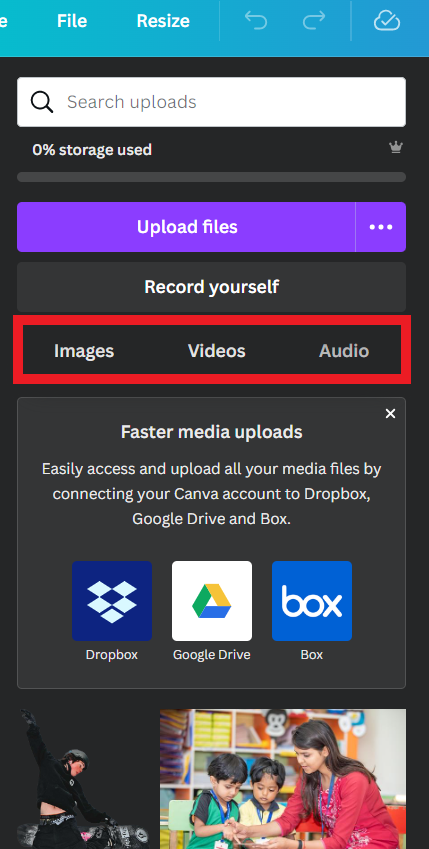
Upload Files allows you to upload already recorded audio and video files. You can also select from 'Images', 'Videos', and 'Audio' files that Canva has in their resources.
Record Yourself When you click 'Record Yourself', you will enter the recording studio where you can record audio and video files.
You will need to set you audio and video settings first. Then click 'Record'. To end the recording, click 'Done'.

You can delete the recording if you do not want to save it by clicking 'Delete'.

When you are done recording, click 'Save and Exit' and the recording will be added to your presentation.

Tutorial Video on Recording in Canva
Click this link to learn more about how you can record yourself in Canva to use in your design:
Add Notes
To add speaker notes to your presentation, please follow these directions:
1. Click on the slide you want to add speaker notes to and then click 'Notes' in the bottom left.
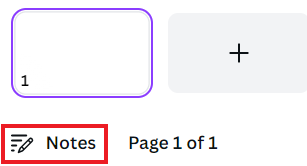
2. When the 'Notes' are appears on the left-hand side of your screen, type your notes for that slide.
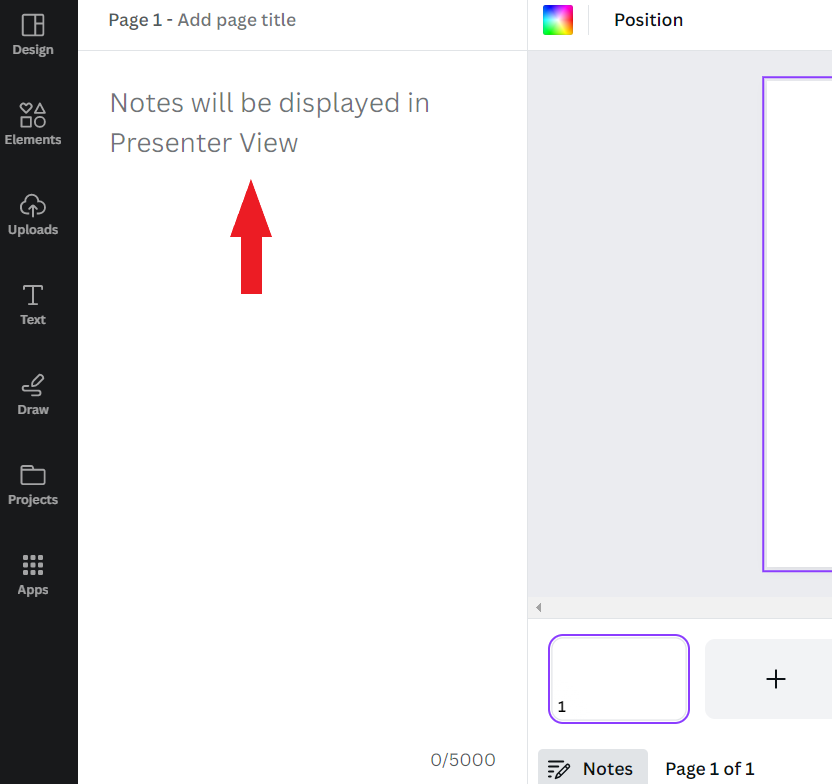
3. Repeat this for any slide you want to add speaker notes to.
Present Your Presentation
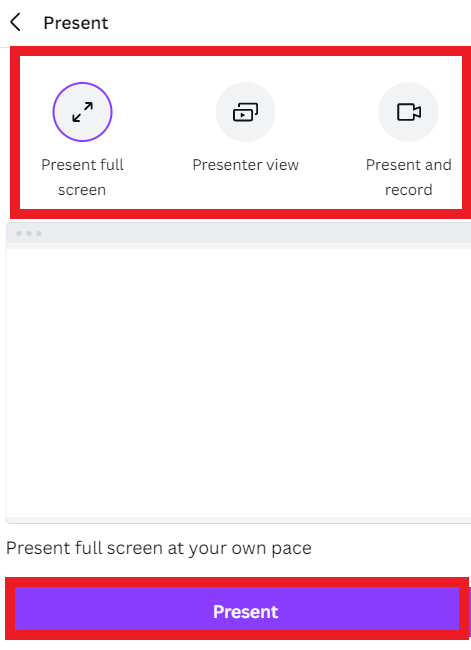
1. Click on 'Present' from the upper right-hand corner of your screen.

2. Choose whether you want to 'Present full screen', present in 'Presenter view' where you can see your speaker notes, or 'Present and record' where it will also record you presenting. After you select how you want to present, click 'Present'.
Share a Link to Your Project with Others
1. Click 'Share from the upper right-hand corner.

2. Click on 'View-only link'.
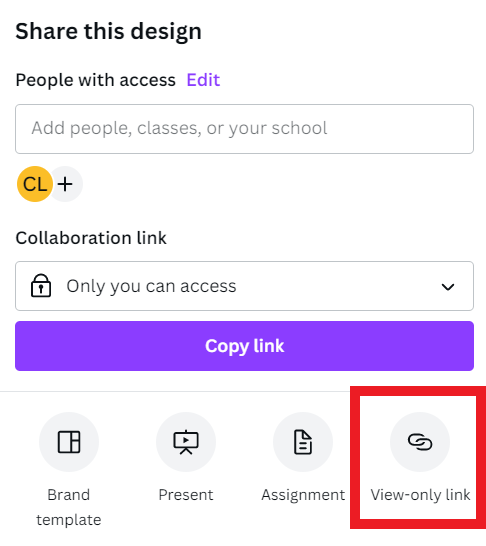
3. When the link screen appears, click on 'Copy' to copy the link.

4. Send the link to anyone that needs to view the presentation.
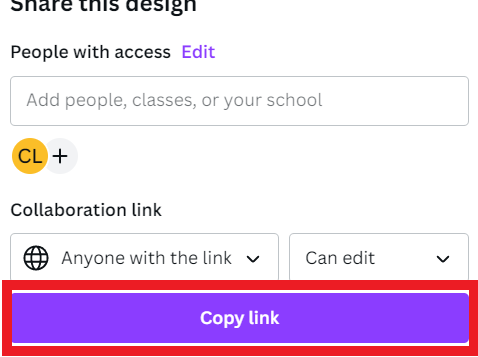
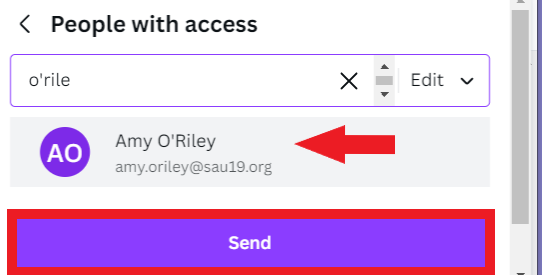
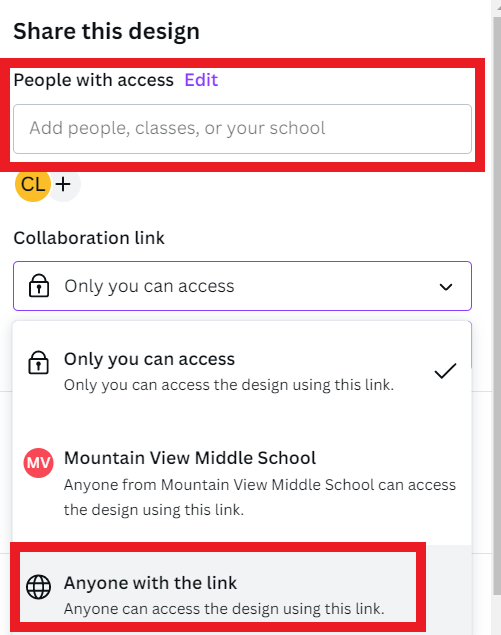
5. You can also add collaborators directly by typing their name into the 'People with access' text field and selecting their name when it auto populates. Then clicking 'Send'.
Or by clicking on the drop-down arrow under 'Collaboration link' and selecting 'Anyone with the link'.
Then choose the rights you want them to have.
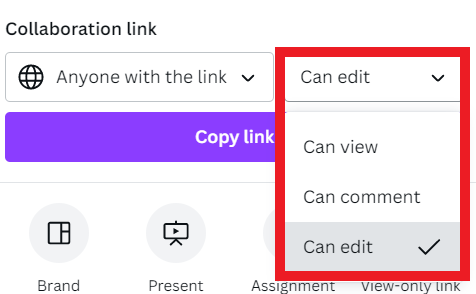
Click 'Copy link' and send the link to anyone you want to collaborate on the presentation with.
