SAU #19 staff can schedule a meeting with other SAU 19 employees directly from Outlook using Outlook Assistant. This allows you to check their availability from within the app, making scheduling meetings a simple process. You can also book specific rooms for these meetings. To use the Scheduling Assistant, please follow these directions:
Microsoft Outlook Desktop App:
1. Open your Outlook Desktop app.
2. Click on the calendar icon from the left side bar.
3. Double click on the date you would like to schedule the meeting for and select the starting and ending time.
4. Click on the Scheduling Assistant tab.
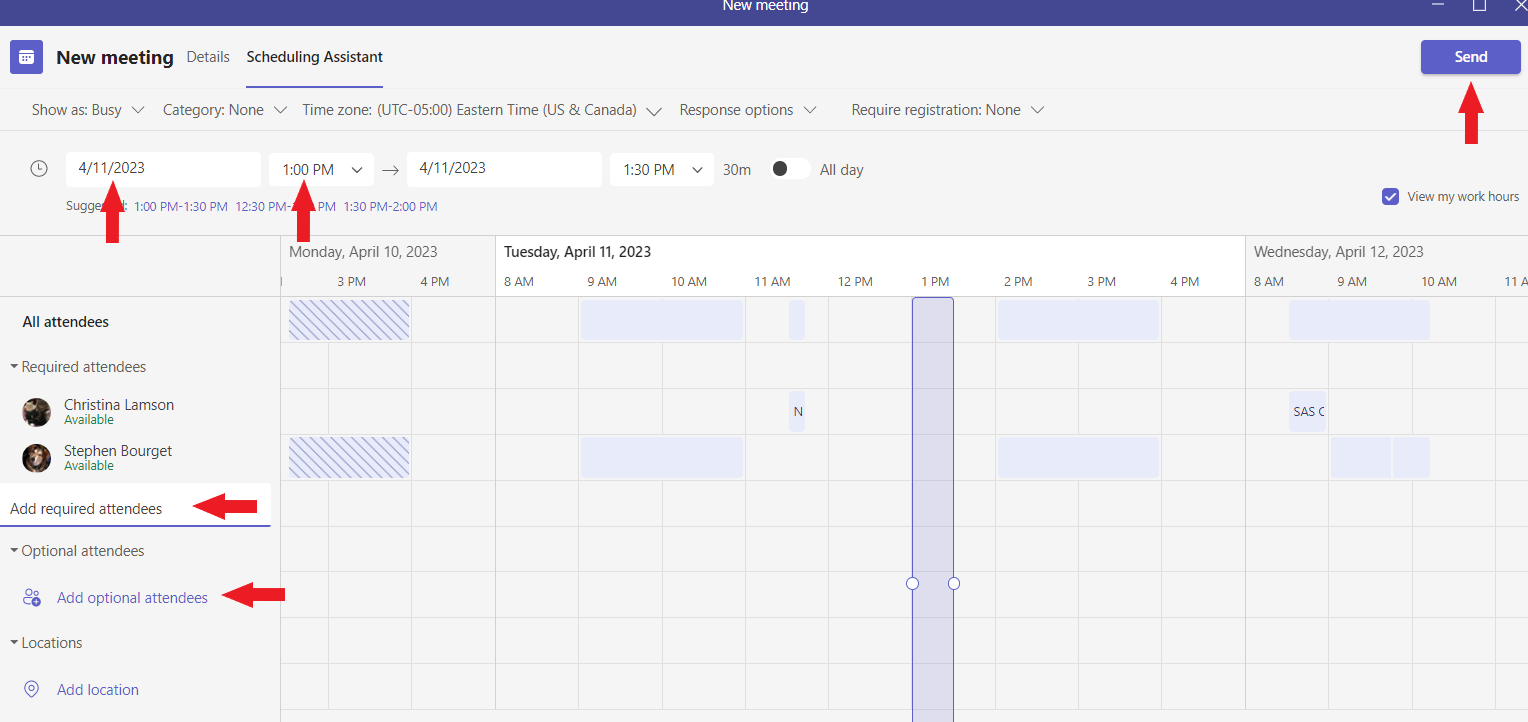
5. Add the names of required and optional attendee by clicking on the Add required attendee or Add optional attendee field box. Then start typing their last name in.
6. When it auto-populates a list of people, click on the person you wish to add.
It will now show you on the calendar whether the attendees are available or not. Use the key on the bottom to understand the color-coded markings.
7. If any attendee is not available, just change the date and/or time to a time that they are.
8. Add a title for the meeting and a location if needed.
*If you need to book a specific location for the room, please follow these instructions:
Under Scheduling Assistant click Add Rooms, select the desired location, and then click OK.
*If you just need to book a room, but do not need to schedule a meeting with others, please follow this same process, however, you do not need to add additional attendees to the meeting invite.
9. Click Send. The meeting invite will get sent to any attendees you added. Once they accept the meeting invite, the meeting will populate on their calendar.
The Scheduling Assistant can also be used in Microsoft Teams by clicking on the Scheduling Assistant tab when creating a new event and following similar steps as above.
Microsoft Outlook Online App:

1. Open your Outlook Online app.
2. Click on the calendar icon from the left side bar.
3. Double click on the date you would like to schedule the meeting for and select the starting and ending time.
4. Click on the Scheduler button on the right.
5. Add the names of required and optional attendees by clicking on the Add required attendee or Add optional attendee field box. Then start typing their last name in.
6. When it auto-populates a list of people, click on the person you wish to add.
It will now show you on the calendar whether the attendees are available or not. Use the key on the bottom to understand the color-coded markings.
7. If any attendee is not available, just change the date and/or time to a time that they are.
8. Add a title for the meeting and a location if needed.
9. Click Send. The meeting invite will get sent to any attendees you added. Once they accept the meeting invite, the meeting will populate on their calendar.
Microsoft Teams App: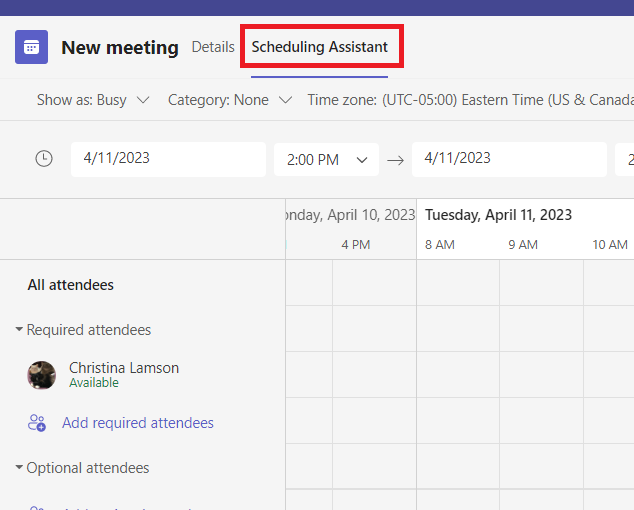
The Scheduling Assistant can also be used in Microsoft Teams by clicking on the Scheduling Assistant tab when creating a new event and following similar steps as above.