SAU #19 Educators can create a custom Bookings Page for others to schedule meetings with them easily. To create, edit, and share your custom Bookings Page, please follow these directions:
To create your own custom Bookings page to allow others to schedule time with you, please follow these directions:


1. Log into https://www.microsoft365.com/apps.
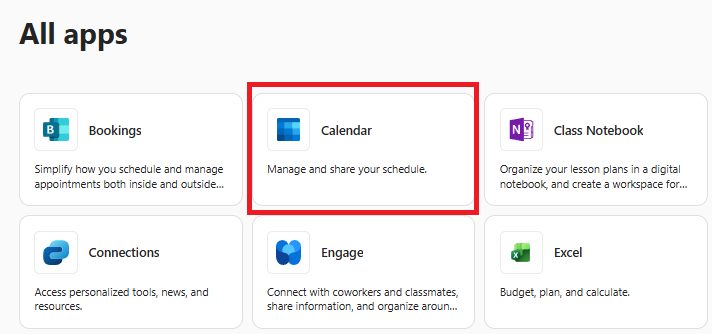
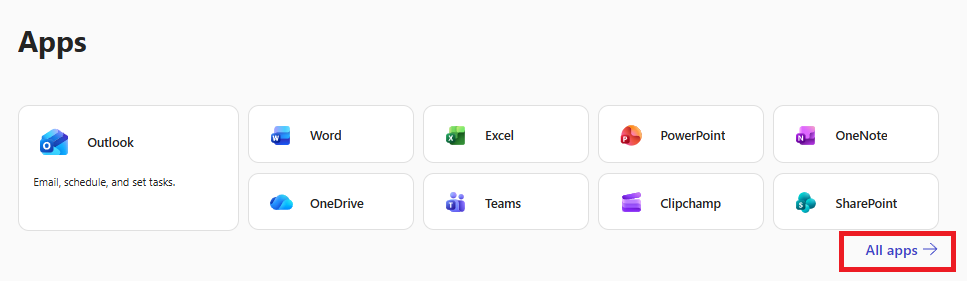
2. Click on the Apps button on the left side bar
3. Under the Apps section, click All apps to view apps that are not listed.
4. Click on the Calendar app.
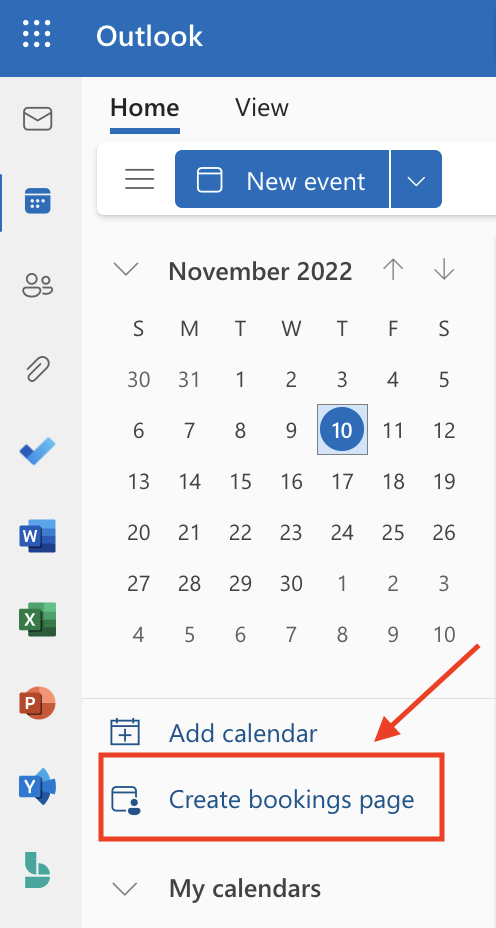
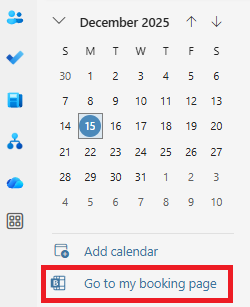
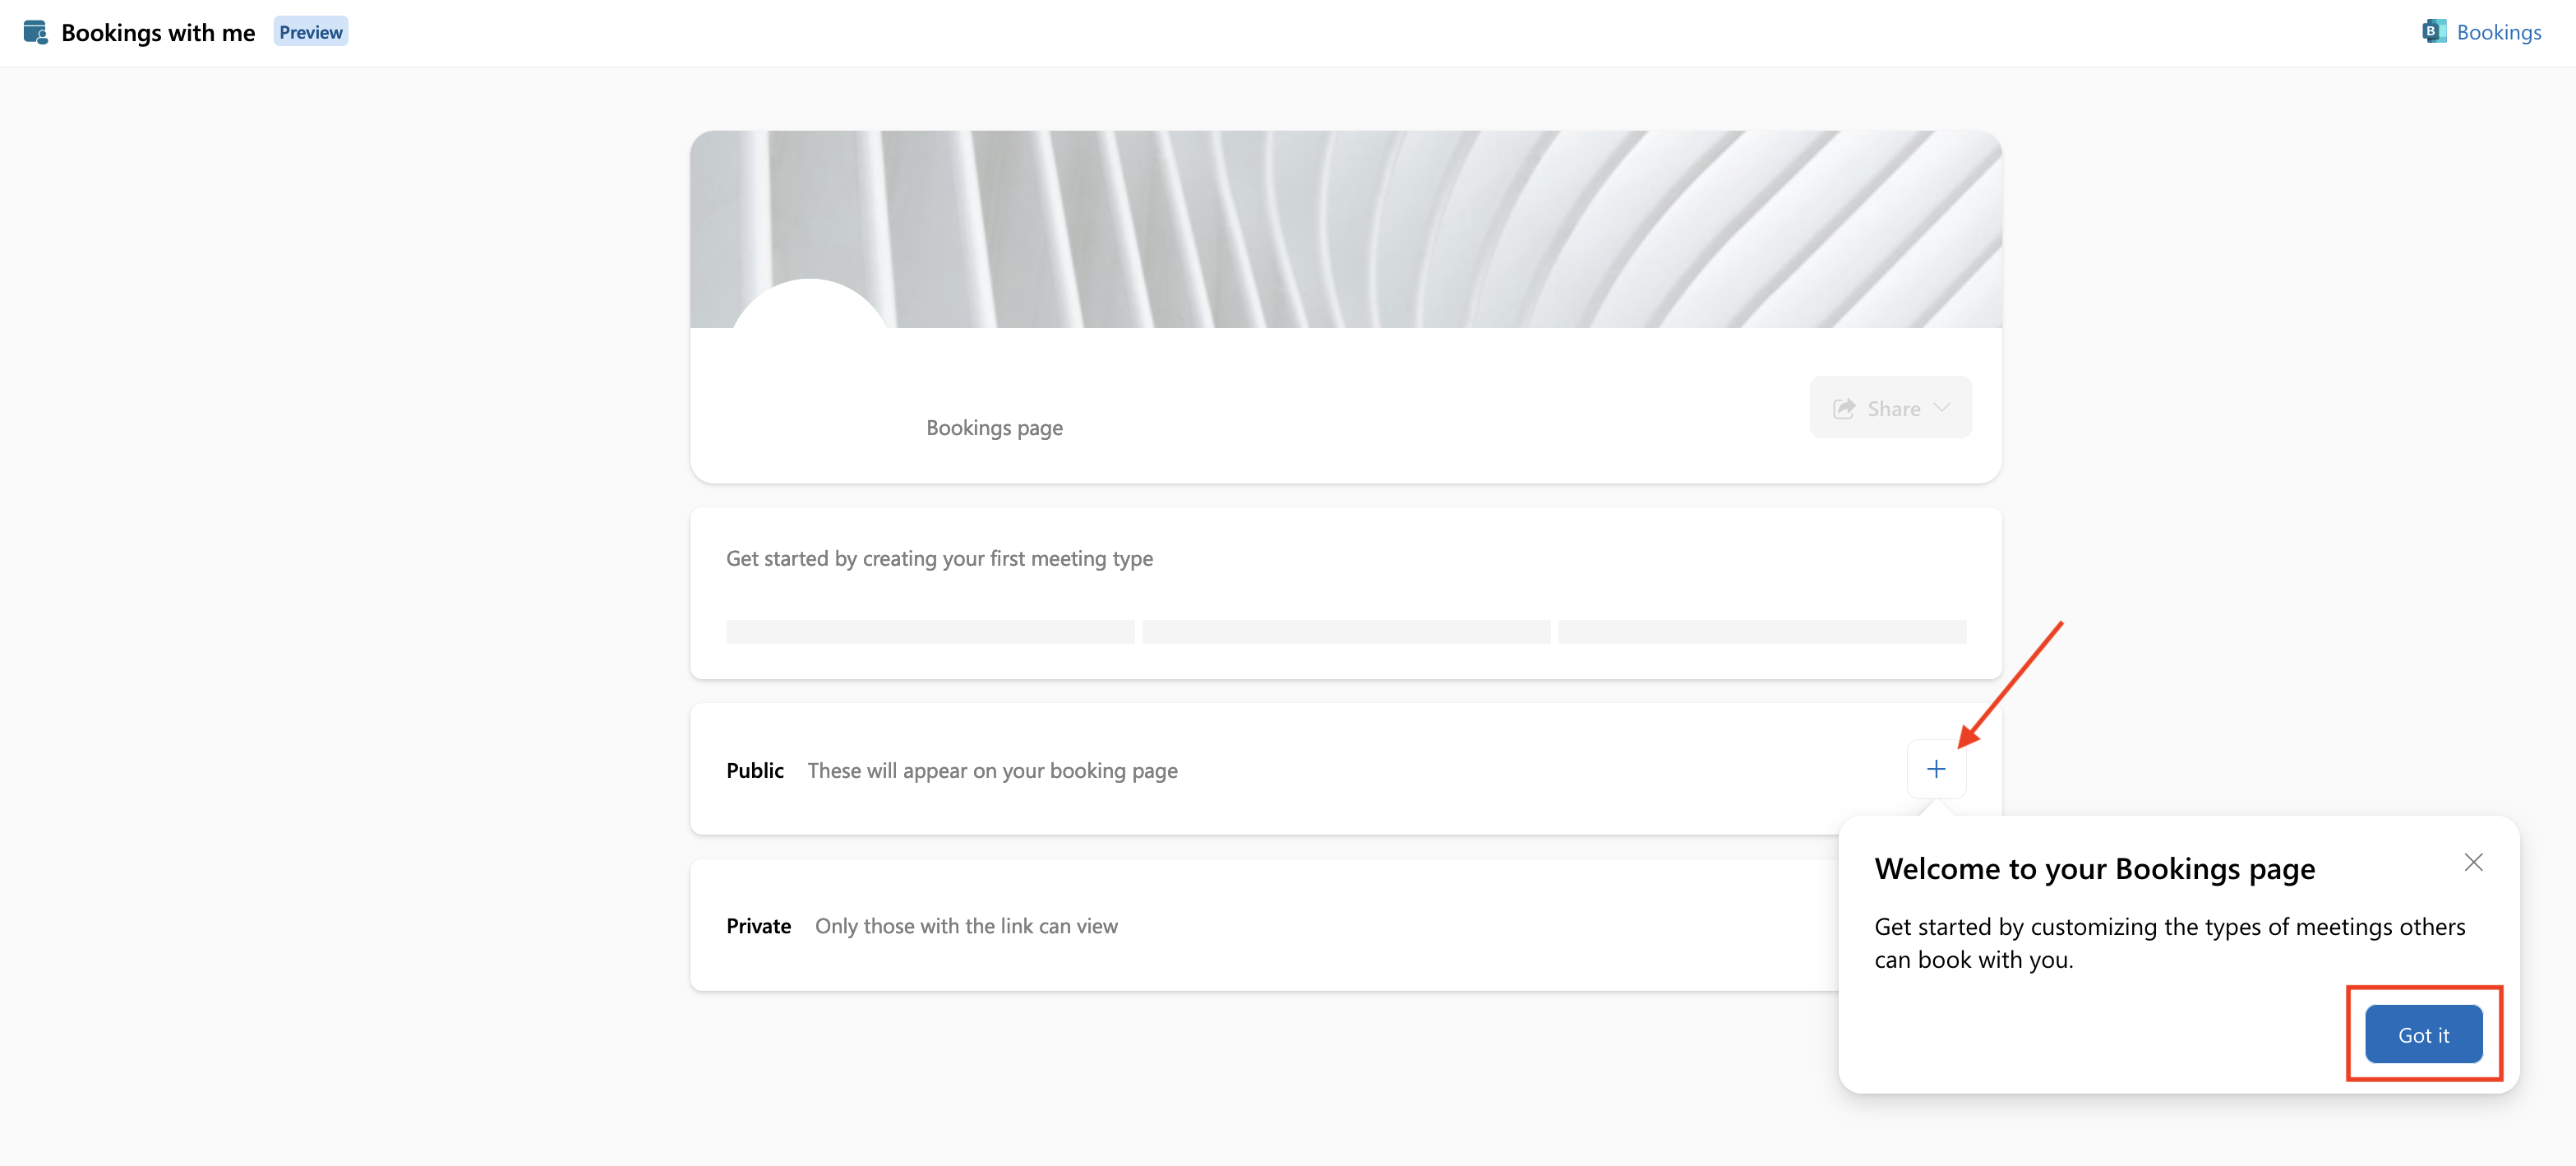
5. Under the calendar on the left-hand side, click the Go to my booking page. If you have never created a Bookings page, you may only see the option to click Create bookings page.
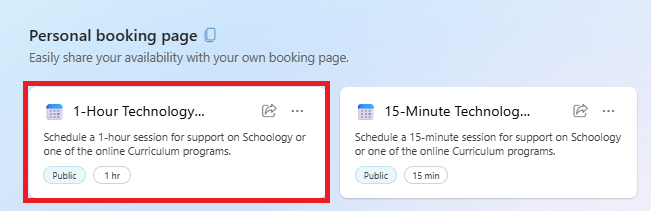
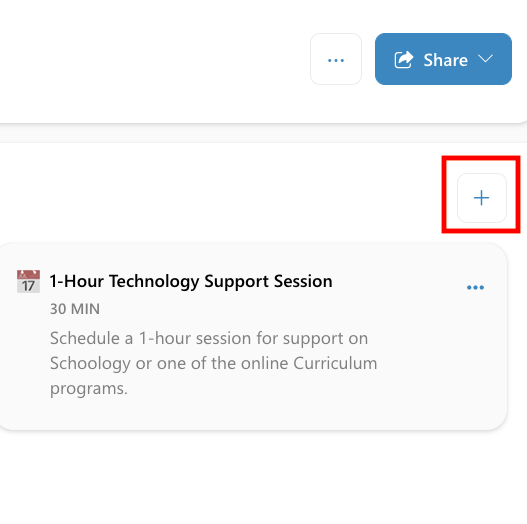
6. Under the Personal booking page section, click Create meeting type.
7. Click Got it or X on the Bookings page welcome message and then click on the + next to Public to set up your Bookings options.
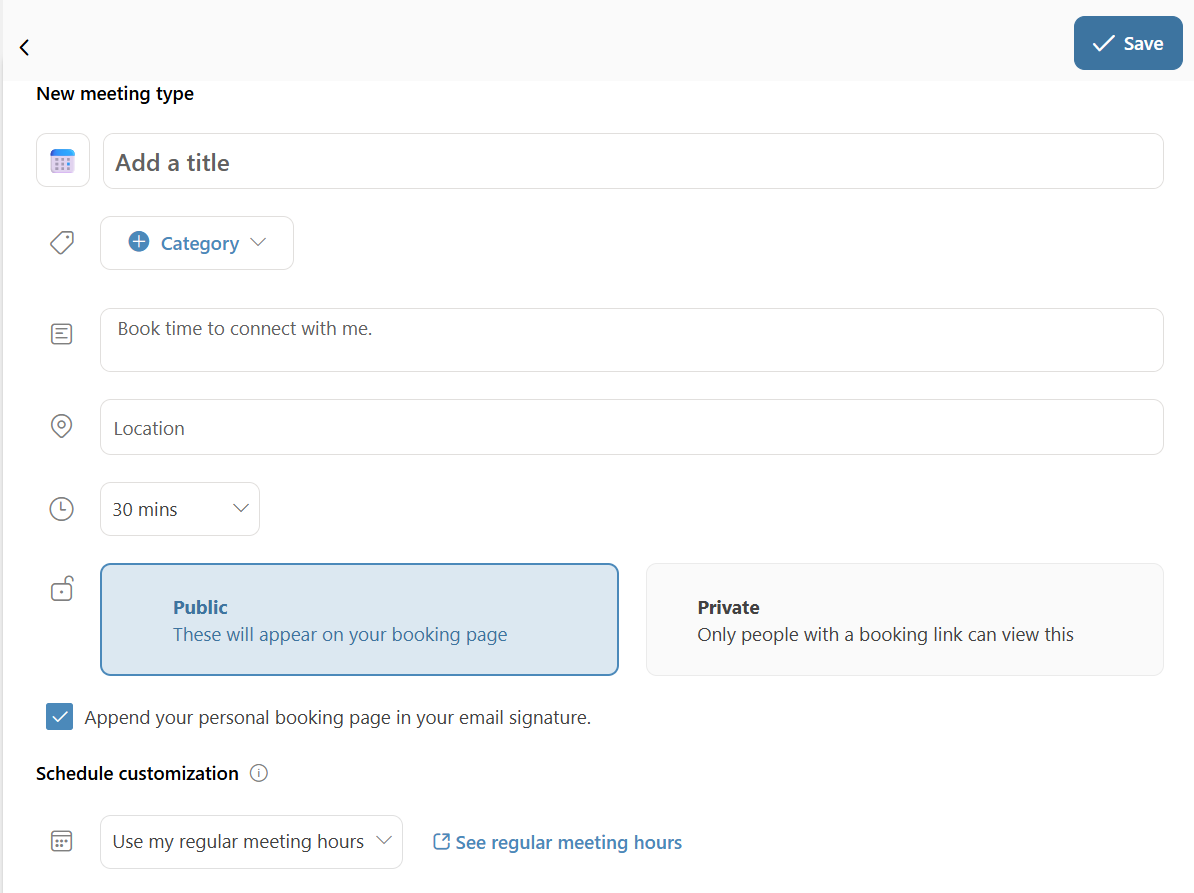
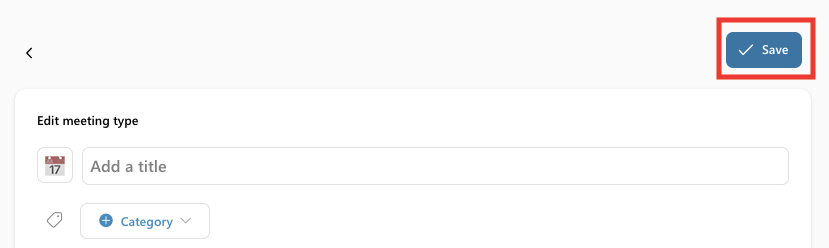
8. Enter the basic meeting option:
a. Enter a title
b. Fill in the description box
c. Toggle the Teams meeting option either ON or OFF
d. Select a meeting time option
e. Select Public
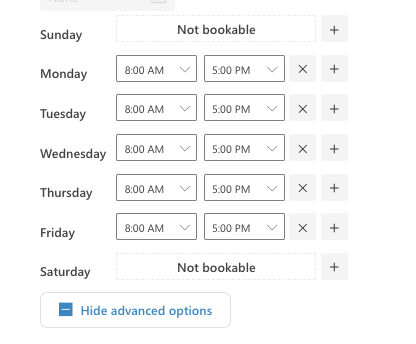
9. Select the desired schedule for the meetings. You can use the regular meeting hours or custom availability hours. Any events on your Outlook Calendar will automatically block off those times on the Bookings page.
a. If selecting regular meeting hours, the hours used when creating the page will populate (click the See regular meeting hours link to view the hours set).
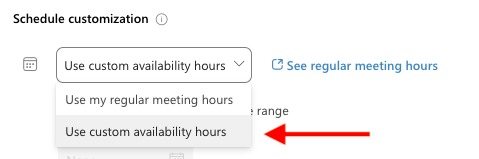
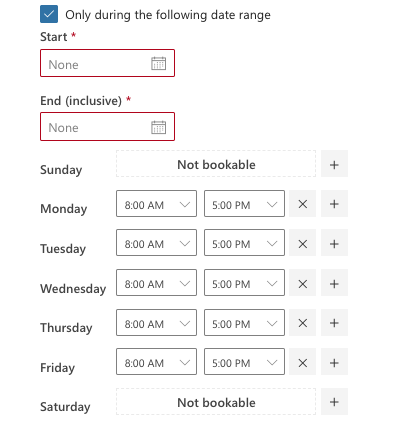
b. If choosing custom hours, select Use custom availability hours from the drop-down menu and select the dates and times you are available for meetings.
c. If you only want a specific date range available, check off the box next to Only during the following date range and then select the date range desired.
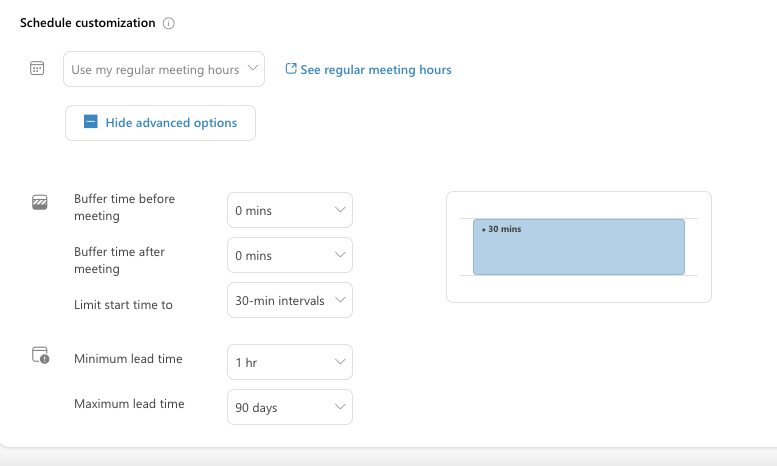
d. To manage other settings, click Advanced options and set the desired settings.
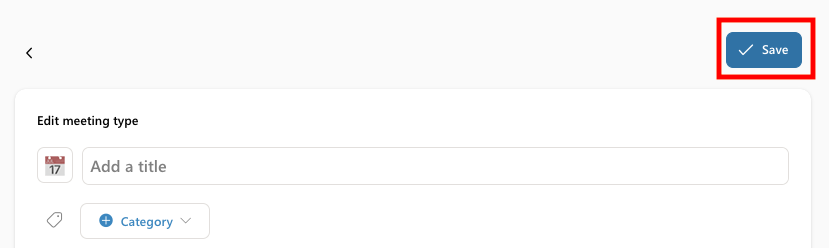
10. Click Save.
You can add multiple meeting time options. To add another, simply click on the + and set the desired settings for each meeting time.
Please Note: The Bookings page banner cannot be edited until the Bookings age has been created.
Edit Your Bookings Page
To edit your Bookings page, please follow these directions:
3. Under the Apps section, click All apps to view apps that are not listed.
4. Click on the Calendar app.
5. Under the calendar on the left-hand side, click the Go to my booking page.
6. Click on the Personal Bookings page you want to edit.
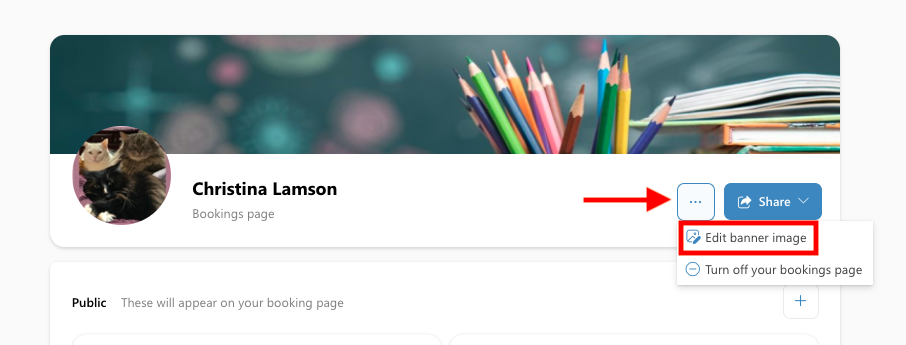
To edit the Bookings page banner:
1. Click on the 3 dots next to 'Share' and select 'Edit banner image'.
2. Click on the desired banner and then click on the 'X' in the right-hand corner.
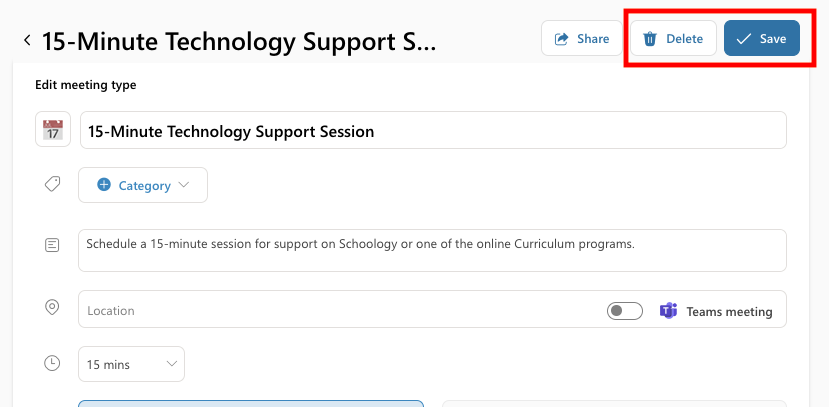
To edit a meeting time option:
1. Click on the meeting time you wish to edit.
2. Edit the information and then click on Save. If you want to delete this meeting option, simply click on Delete.
To add a meeting time option:
1. Click on the + in the meeting time section.
2. Enter the desired information.
3. Click Save.
Share Your Bookings Page
To share your Bookings page, please follow these directions:
1. Click on Share.
2. Select the method to share the page:
a. Copy link - can be used to copy the link and share it directly with others.
b. Share via email - can be used to send the link directly through an email message.
c. Add to email signature (desired method) - can be used to add the Bookings page link directly to your web Outlook email signature (if set up). This will not add it to the desktop add signature.