Creating a Rubric
Teachers can create a rubric that can be directly attached to assignments in Schoology, scored interactively, and have the total points auto-scored. To do this, please follow these directions:
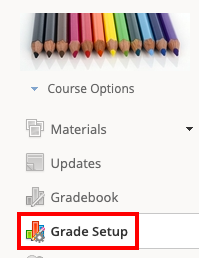
1. Go into the Course you built the rubric in and click on 'Grade Setup' from the left side bar.
2. From the right-hand side, click 'Add' and then click 'Rubric' from the drop-down menu.
3. Title the rubric.
4. Add titles and descriptions for each learning objectives/criteria by clicking into the respective field and typing into it.
5. Adjusts the points you wish each learning objectives/criteria to have and add any information to clarify what will earn those points by clicking into the respective field and typing into it.
6. Add additional rows of learning objects/criteria by clicking on 'Learning Objectives' or 'Criteria' below the rubric.
7. To add additional columns to the scale, hover over the cell and click the + icon that appears to the left and right of each cell.
8. To remove a row or column, hover over the cell and click on the x icon that appears in the upper right.
9. To reorder the rows, click on the three lines to the left of the learning objects/criteria and drag it to the appropriate location.
10. Use the menu items on the upper left to close, expand, or hide the rubric.
11. Click 'Create' to complete.
Copying a Rubric to Other Courses You are the Admin for
Teachers can create a rubric in one Course and then copy it to the rest of their Courses at one time. To do this, please follow these directions:
1. Go into the Course you built the rubric in and click on 'Grade Setup' from the left side bar.
2. Click on 'Copy Settings' from the right-hand side.
3. Select the settings to copy. If you would like to just copy the rubric, please make sure that only the Rubrics check box is selected. Click the Course(s) you want to copy it into and then click 'Copy'.
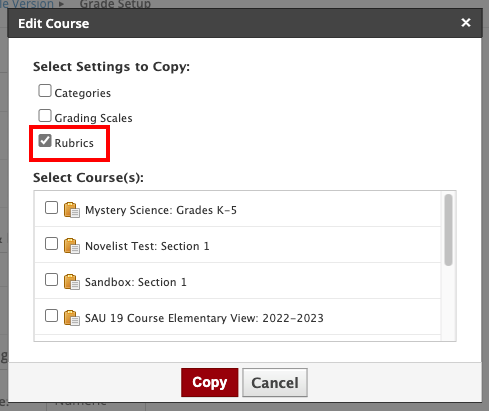
The rubric will now be located in the 'Grade Setup' section of the Course(s) you copied it into.


Adding a Rubric from Resources or a Collection to a Course
Saving Rubrics to Resources
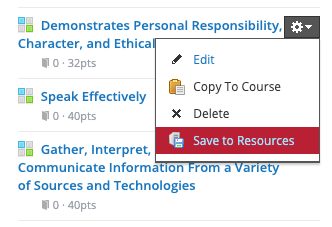
Once you have created a rubric, you can add it to your Resources. To do this, please follow these directions:
1. Go into the Course you built the rubric in and click on 'Grade Setup' from the left side bar.
2. Click on the 'Rubrics' tab on the right-hand side.
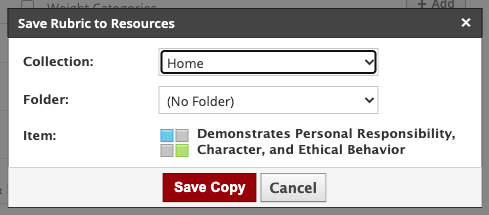
3. Click on the gear next to the rubric and select 'Save to Resources'.
4. Choose the location to save it to and then click 'Save Copy'.
The rubrics will now be located in your personal Resources.
Creating and Sharing a Rubrics Collection
You can add rubrics to a collection that you can share with other colleagues. To do this, you must create a new collection and share it by following these directions:
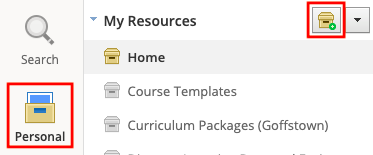
1. Click on 'Resources' from the top navigation menu.
2. Ensure 'Personal' is selected from the left-hand side. Then click on the 'Collections' icon.
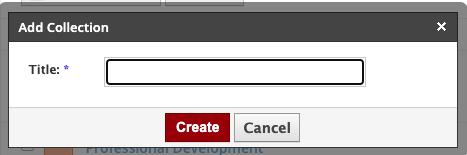
3. Title the Collection.
4. Add the rubric into this Collection, either directly from the Course or from a saved file in your Resources.
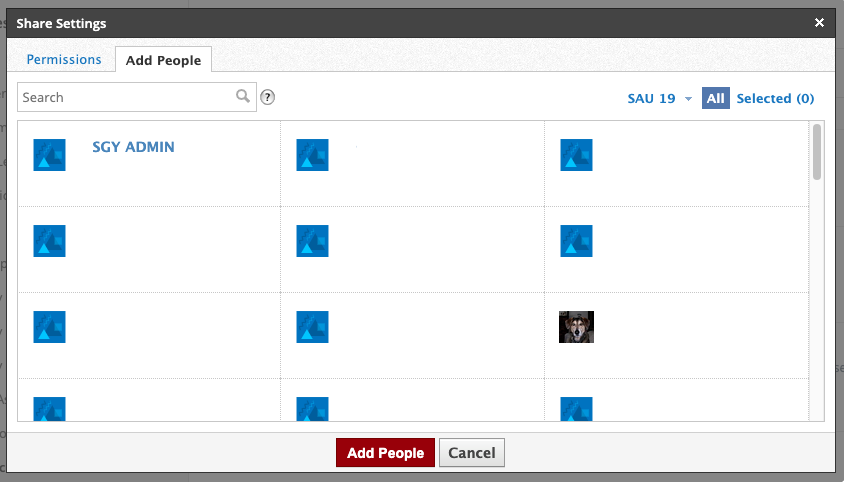
5. Click on the 'Share' tab.
6. Select the people you wish to share the collection with and then click 'Add People'.
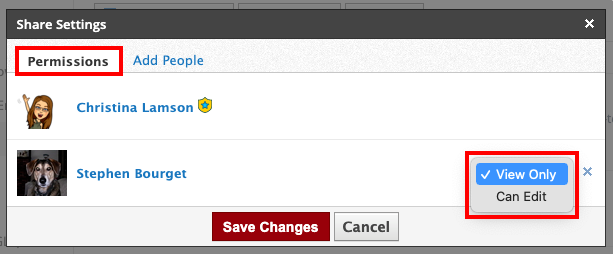
7. Click on the 'Permissions' tab and change any permissions you'd like from the drop-down list next to the names of the people you are sharing it with and then click 'Save Changes'.
8. You will now see the 'Share' tab change into 'Sharing' with the visible number of people you are sharing the Collection with.
The Collection and rubric will now be visible by the selected people in their Resources section.
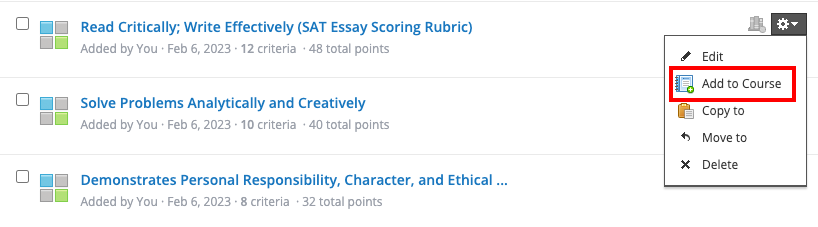
Adding a Rubric from Resources or a Collection to a Course
You can add rubrics from a Resources and/or a Collection to your Course(s). To do this, please follow these directions:
1. Click on the gear next to the rubric and select 'Add to Course' from the drop-down menu.
2. Pick the Course(s) you want to add the rubric into and click 'Add'.
The rubric will now be located in the 'Grade Setup' section of the Course(s) you added it into.
Add a Rubric to an Assignment
You can add rubrics directly to an assignment to easily score. To do this, please follow these directions:
1. Start setting up an assignment in your Course.
2. In the 'Scale/Rubric' setting, select the rubric you want to attach to the assignment.
2. Make sure that the 'Show to students' check box is selected.
3. Finish setting up the assignment and click 'Create'.
***Please note, you cannot click on the 'Ungraded' category or the total points will not transfer into the Schoology Gradebook.
The rubric will now be visible to students and teachers when grading.
Grading Using the Rubric
You can click directly on a rubric attached to an assignment to select the points a student earned in each category. The total scores will auto-populate and transfer directly into the Schoology Gradebook. To do this, please follow these directions:
1. Click on an assignment.
2. Click a student's name under 'Submissions' from the right-hand side.
3. Click on the 'Grade' button at the top of the assignment.
4. When the rubric open, click on the boxes for the score in each category the student earned. The total points will auto-populate.
5. To add a comment to a score, hover next to the points on the right-hand side, click on the word bubble icon, and enter your comment. Then press the 'Enter' button.
6. When you are done scoring a student, click 'Save. The scored rubric will now be visible to the student and the total points will appear in the Schoology Gradebook.