Microsoft Teams Premium is an offering that builds on the current Teams experience with additional features that help make Teams meetings even more personalized, intelligent, and protected.
With Teams Premium, you will:
Receive intelligent meeting recaps on recorded meetings that automatically generate meeting notes, recommended tasks, and personalized highlights to help you get the information most important to you.
Receive a transcription of the Teams Meeting
Access meeting attendance with engagement data.
Access the meeting recording with the addition of the ability to jump to specific speakers within the recording, skip to AI generated topics, and navigate via AI generated chapters.
Use Live Captions to Close Caption the meeting in English or several other language options.
If you are a staff member with the Teams Premium license, please follow these instructions to utilize the additional features.
Please Note: To utilize these additional features, you must make sure you record your Teams meeting.
Locating AI Notes
1. Open the Teams app and click on Chat on the left side bar. Then click on the Chat from the meeting you want to access.
2. Click on the Recap tab on the top navigation menu. Then click AI notes. You will then see the AI generated notes from the meeting. Click Copy all to copy the notes into other apps for revising and editing.
Locating the Meeting Transcript
1. Click on the Recap tab on the top navigation menu.
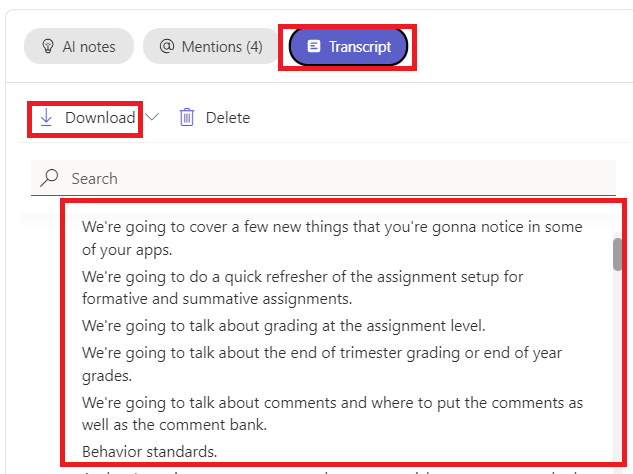
2. Click on Transcript to access the AI generated transcript of the meeting. Please Note: this may include inaccuracies. The transcript can be downloaded by clicking Download.

Locating the Meeting Attendance
1. Click on the Attendance tab on the top navigation menu.
2. Click the Attendance tab on this screen and you will see the data for any one in attendance.
3. To download the attendance data, Download in the upper-right hand corner of the attendance tab.
4. Click the Engagement tab to see engagement data for people in attendance.
Please Note: You can also access and download attendance data by clicking on the Chat tab on the top navigation menu, scrolling until you locate the meeting recording, and clicking on the Attendance button on the recording.
Locating the Meeting Recording
1. Click on the Recap tab on the top navigation menu.
You can now replay the meeting recording
2. Click on the Speakers tab to be able to jump to areas of the video where those people spoke during the meeting. Click on the colored bars below the speaker to jump to that section of the recording.
3. Click on the Topics tab and click on a topic to jump to the specific AI generated sections within the video.
4. Click on the Chapters tab and click on a chapter to jump to the specific AI generated sections within the video.
Please Note: You can also access the meeting recording by clicking on the Chat tab on the top navigation menu, scrolling until you locate the meeting recording.
Utilize Live Captions During a Meeting to Close Caption a Teams Meeting Real Time (Available in Various Languages)
1. During a Teams Meeting, click on More in the navigation menu, then click on Language and speech, and select Show live captions.
Follow these same steps and select Hide live captions to turn off the captions.
2. Once the captions have begun, you can change the spoken language and other settings by clicking the gear icon to the right of the captions.
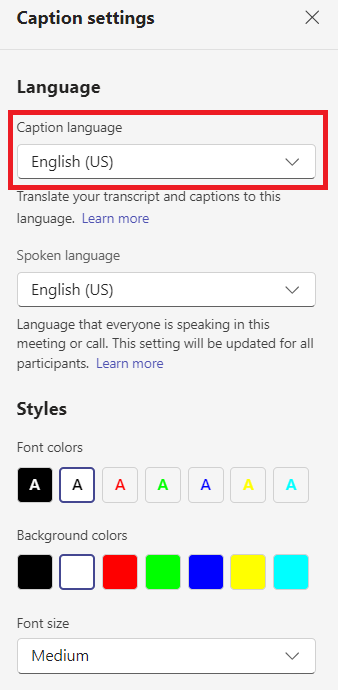
3. Click the drop-down menu under Caption language to change the language the captions will appear in.

Important:
When you change the spoken language setting, it affects everyone. The captions and transcript language will change for all meeting participants. Be sure to only change the Caption language.
Captions will not be saved and cannot be accessed once a meeting has ended.
Set Up Live Translated Captions Prior to a Meeting
Organizers can preselect which languages attendees can see live captions in by changing this in the meeting settings prior to the meeting start time.
1. Click the event in your Outlook calendar.
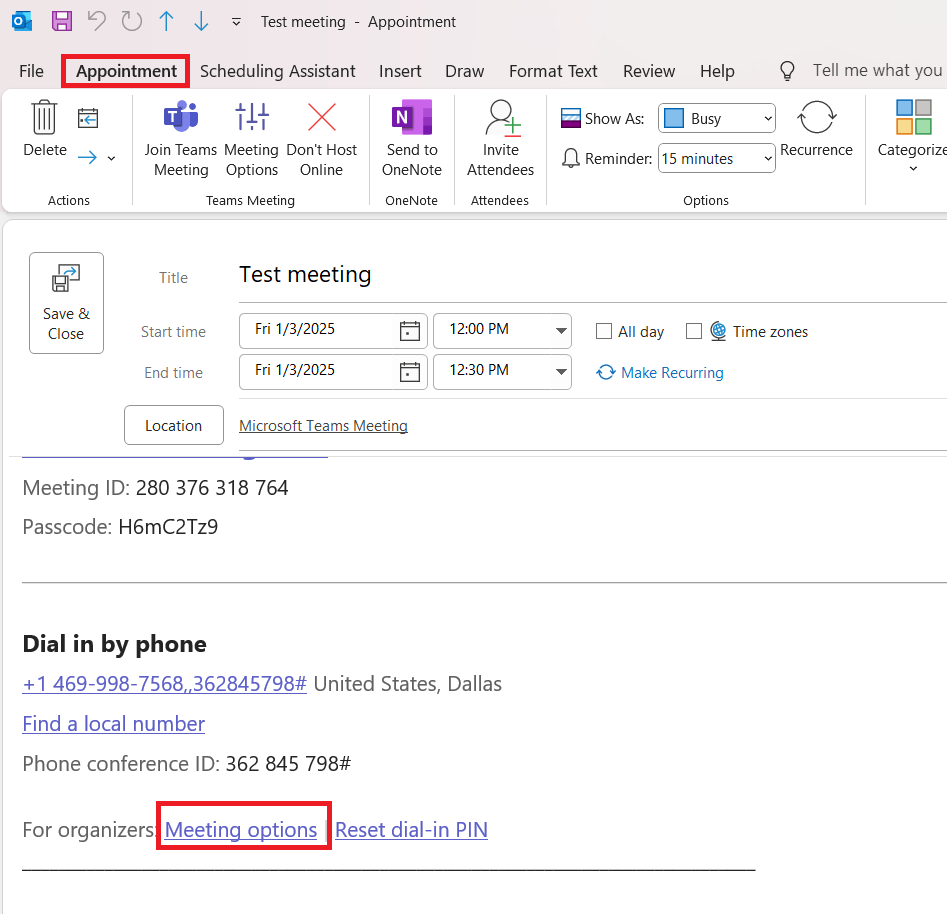
2. Click on the Appointment tab and click on Meeting options.
3. In Translate attendee captions, select the languages that live translated captions will be available in during your event. Please Note: Attendees must have already been added to the meeting invite for this option to be available.

4. Select Apply. Attendees will only be able to see live translated captions in one of the languages you preselected.
Customize captions
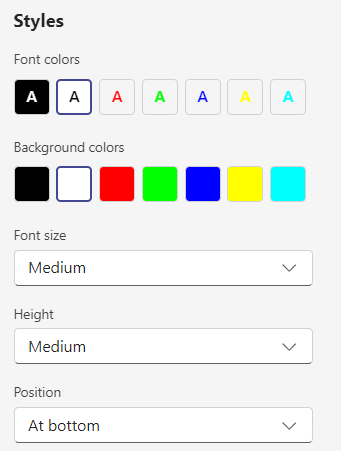
If you're using the desktop app on Windows or Mac, you can customize the font size and color, increase the number of lines displayed, and change the positioning of the captions in the meeting window.
1. Once the captions have begun, you can change the spoken language and other settings by clicking the gear icon to the right of the captions.

2. You can then choose from different style settings.

