Logging into and Utilizing Your Schoology Parent Account via an Internet Browser
We highly recommend that parents utilize their account via browser even when using a mobile device.
2. Enter your log in credentials and click Log in.
For Parents/Guardians with Both PowerSchool and Schoology Accounts (Created Before the PowerSchool Product Enhancement)
For Parents/Guardians with a Schoology Account but No PowerSchool Account
Log into your Schoology parent account using the credentials you chose when creating your account.
For Parents/Guardians with a PowerSchool Account but No Schoology Account (Before the PowerSchool Product Enhancement)
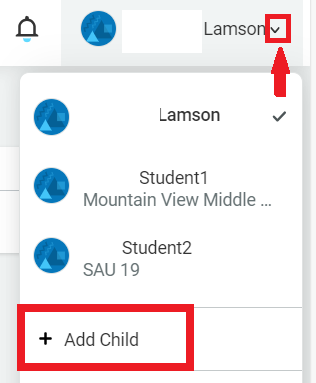
3. To add another child to your account, click on the drop-down menu next to your name in the upper right-hand corner and select Add Child and enter their access code.
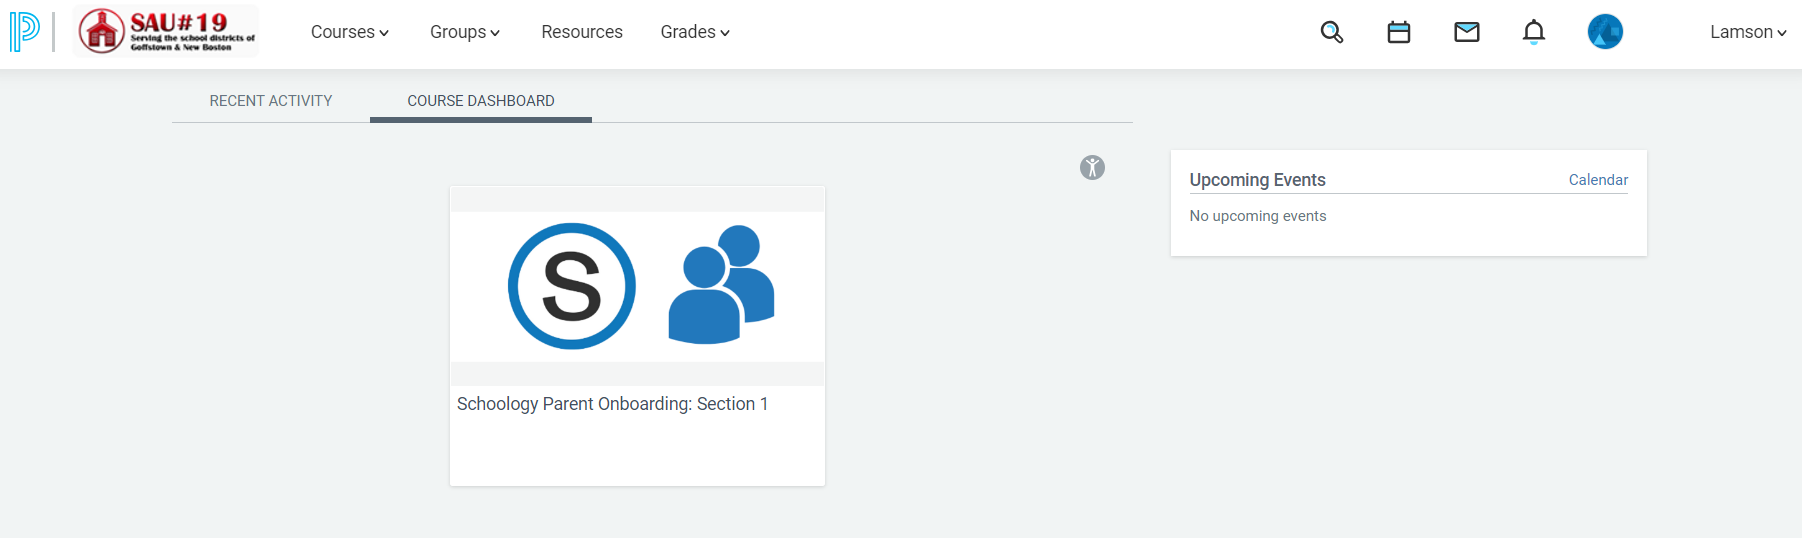
4. Once logged in, your Course landing page will be blank. Once we have manually added you into the Parent Onboarding Course, you will then see that Course icon.
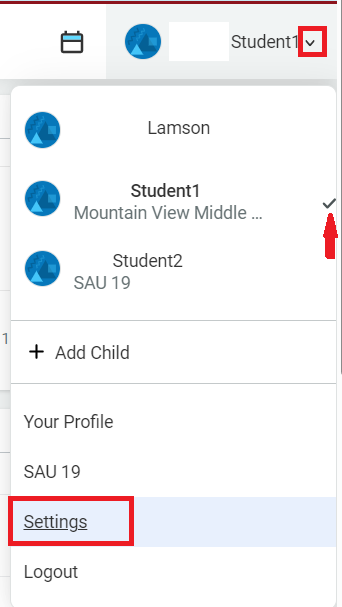
5. To view your child’s information, click on the drop-down menu next to your name in the upper right-hand corner and select which child’s information to view (the person’s view currently displayed will have a checkmark next to their name).
You can toggle back and forth between multiple children.
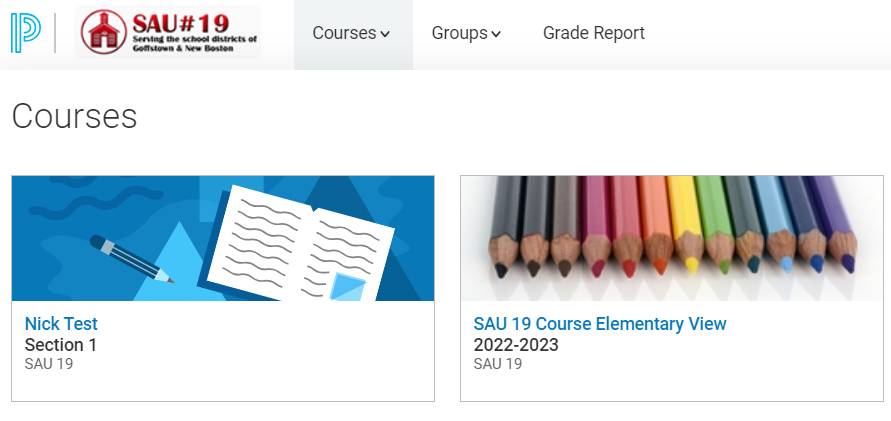
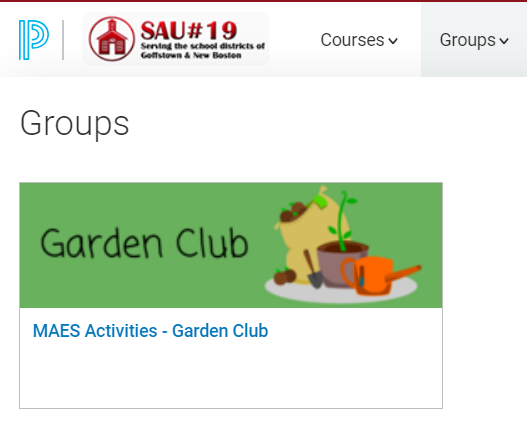
You will now be able to view any Courses or Groups your child is in by using the navigation bar at the top of the screen. Simply click into the Course or Group to see your child’s information.
*Please Note: Parents will only be able to view their child’s information. Parents cannot make any changes or upload any materials for their child.
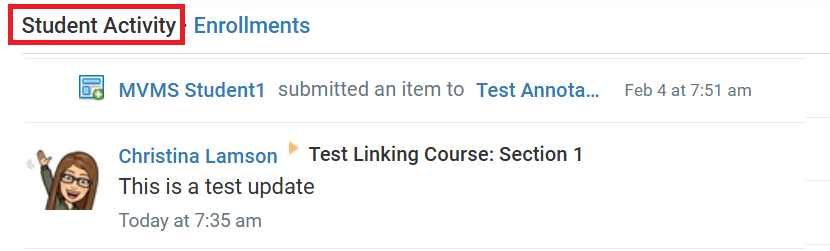
The main landing page will have two tabs: Student Activity and Enrollments. The Student Activity will give an overview of any assignments the student has digitally submitted, as well as any Course updates teachers have posted. The Enrollments tab will list the student's classes.
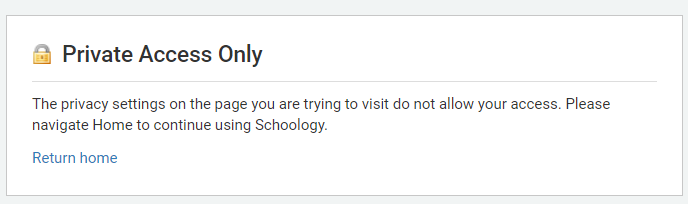
6. When inside a Course, you will see curriculum resources on the left side bar. Parents will not be able to access these resources through their account. Instead, a Private Access Only message will appear. If you receive this message, simply navigate back to your child’s account by clicking the back button on your browser or by clicking on the Return home button in this message.
To view Course content the teacher has added, be sure the Materials tab is selected (which should be the default selection). Then click on the content you wish to view.
To view any updates the teacher has posted, click Updates on the left side bar.
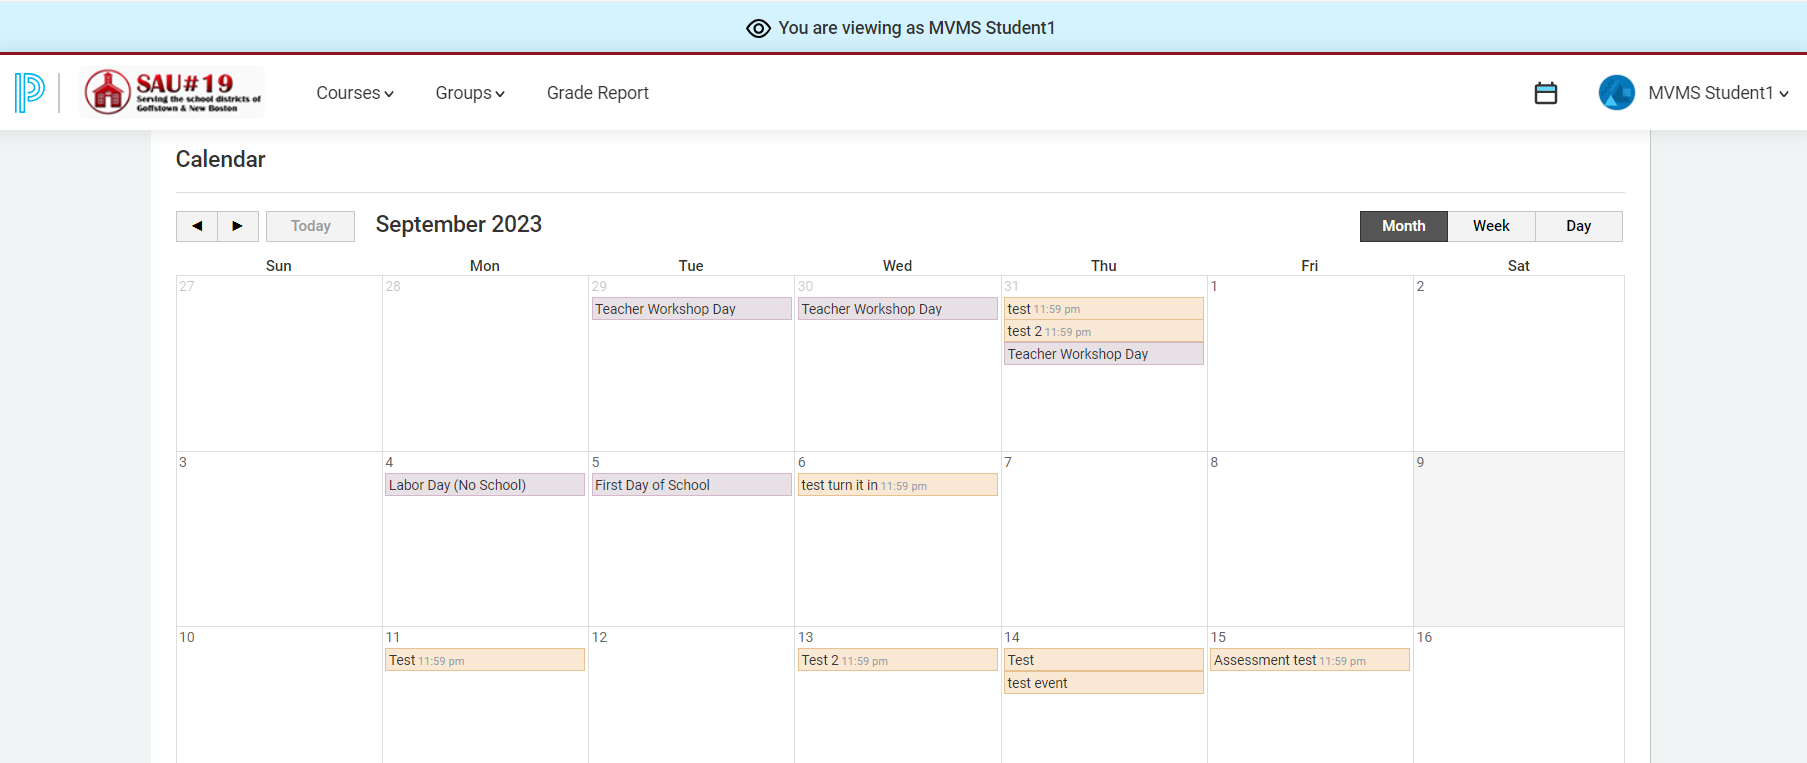
7. To view events related to your child, such as important school events, assignment due dates, or field trips, simply click on the Calendar icon in the upper right-hand corner . If you have more than one child, you can select which calendar to view by using the drop-down menu next to the number of calendars and checking the box next to the calendar you wish to view.
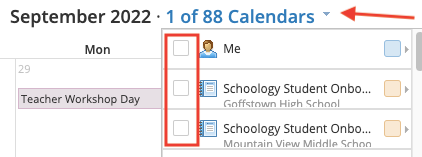
These calendars will be color coded.
8. To change your notification settings, click on the drop-down menu next to your name in the upper right-hand corner. Be sure to select the name of one of your children and then select Settings.
9. Click on the Notifications tab.
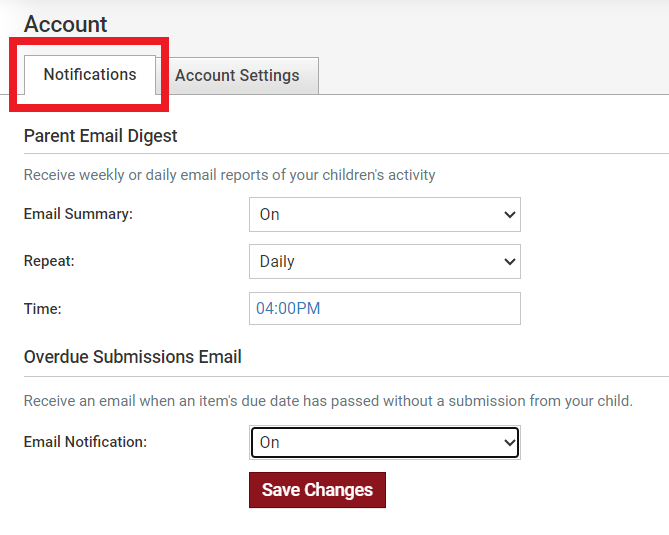
10. Change the settings according to your preference. Parents will receive a daily Parent Digest email with your child’s activity in Schoology for the day. You can change the settings on how often you receive the email digest. You can also change the time that this email will be received. Parents can also choose to receive an email notification for overdue submissions for their child.
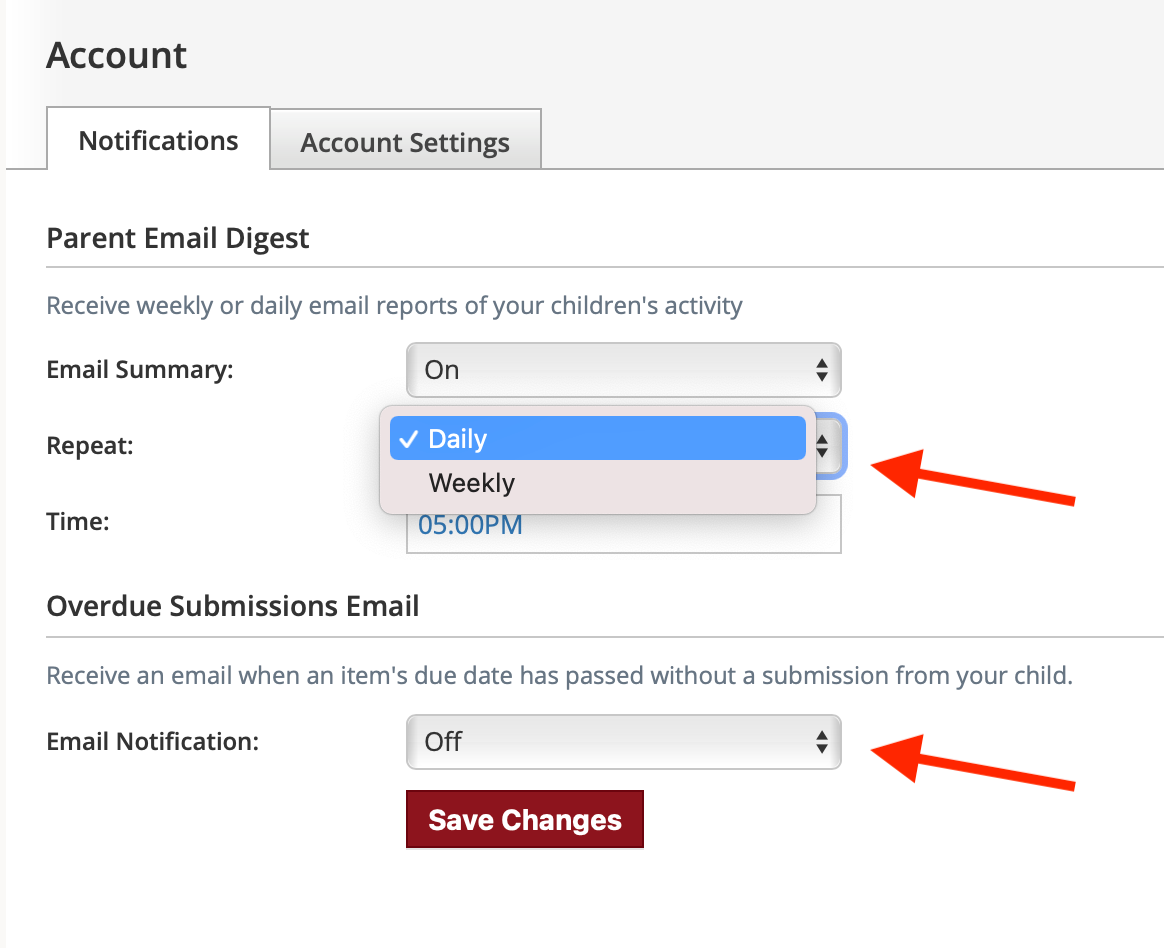
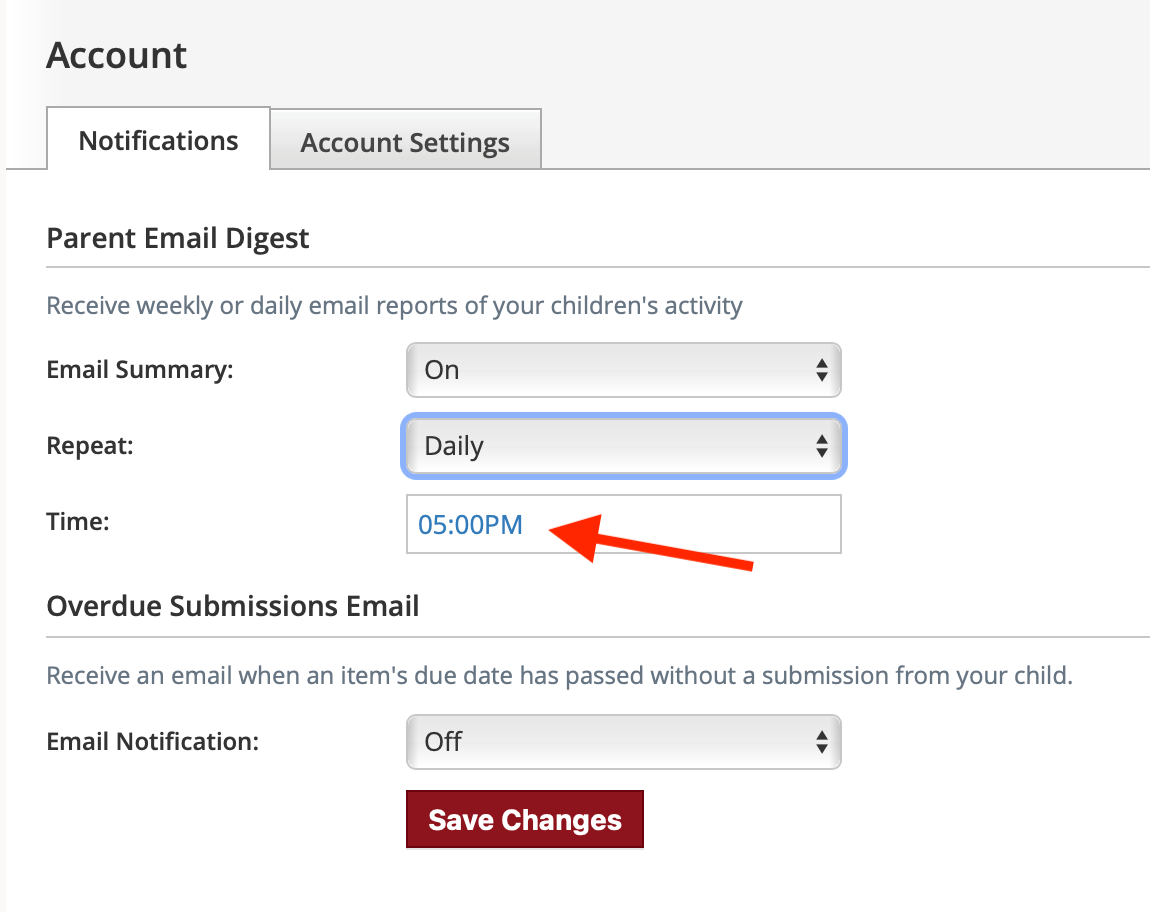
Parents can also choose to receive an email notification for overdue submissions for their child.
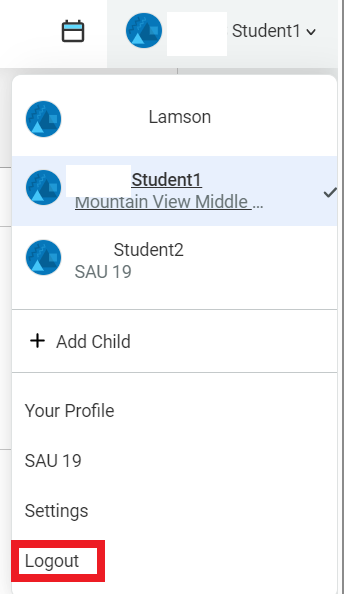
11. When you are done accessing your Schoology account, please remember to Logout by clicking on Logout for the drop-down menu that appears under your name.