Creating Classes
If you haven't created your first class yet, here's how:
1. Log in to your individual account.
2. Click Dashboard at the top of the screen.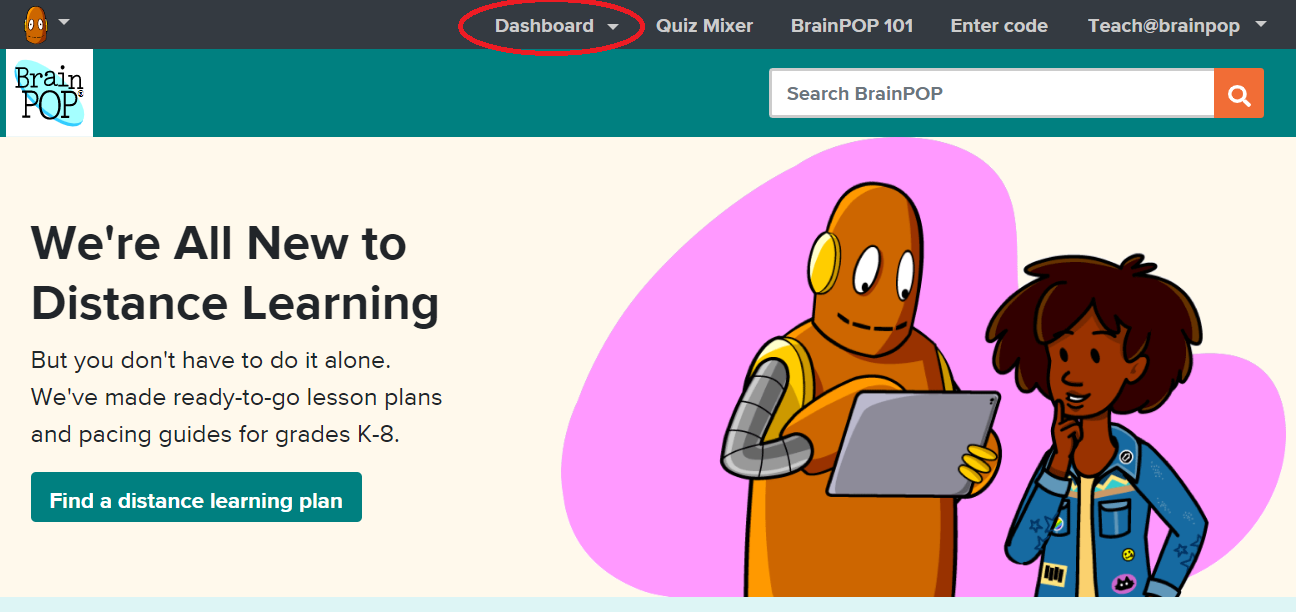
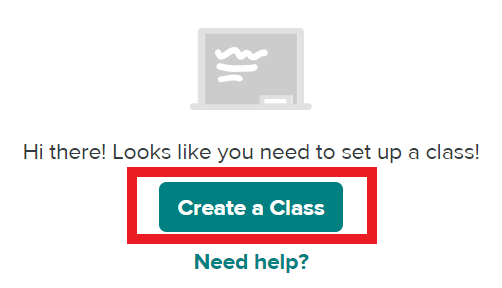
3. Click New Class or Create a Class.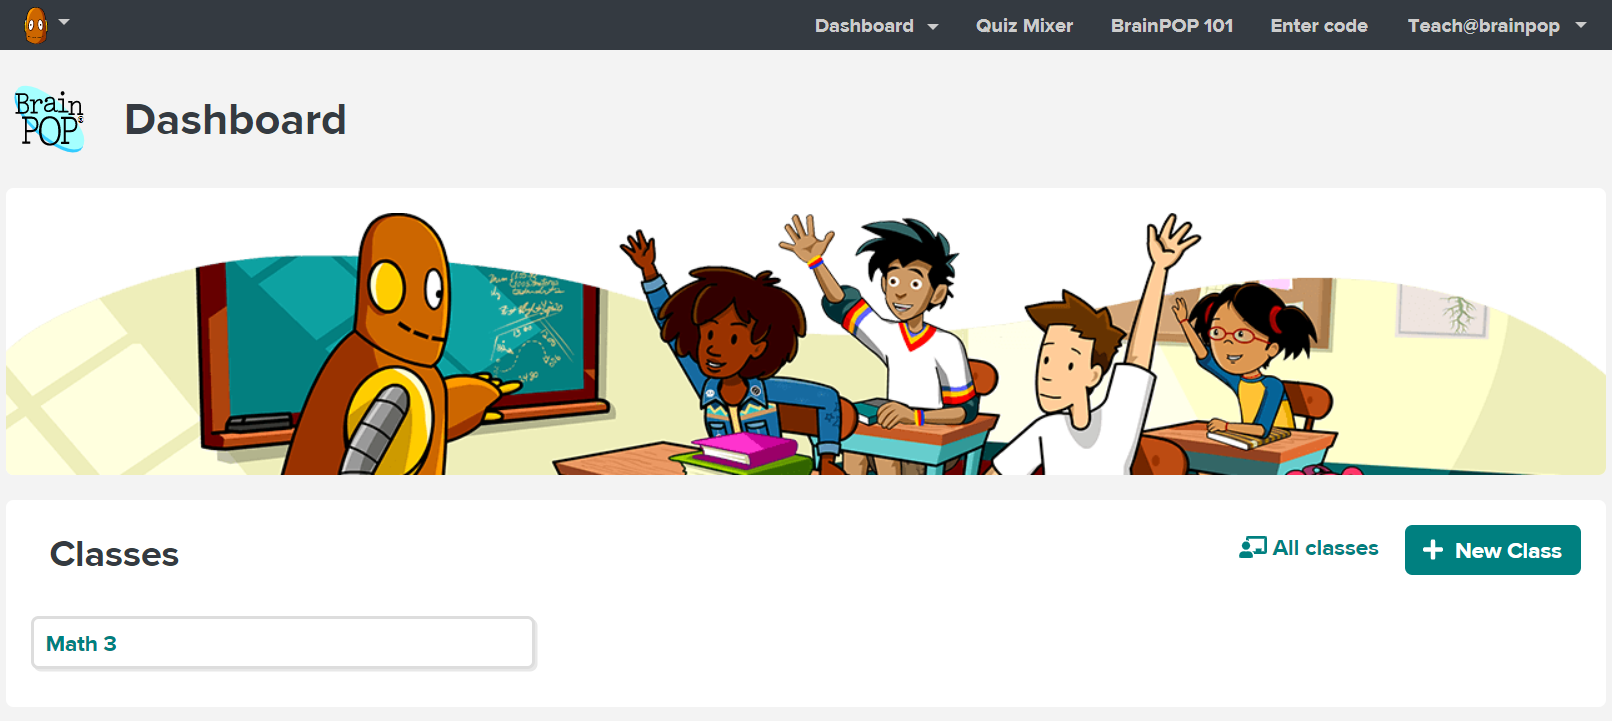
4. Create a class name. A class code will be automatically generated for you.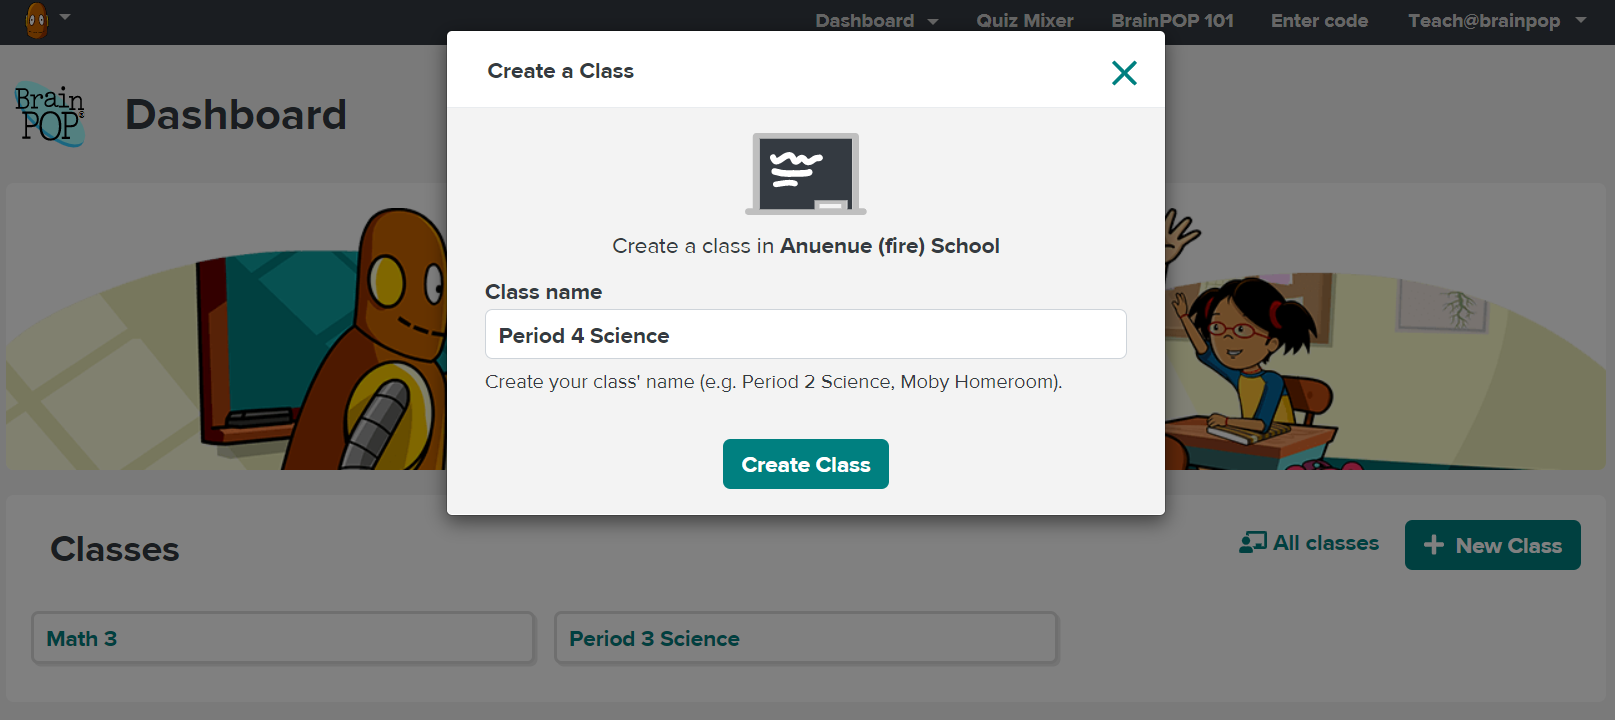
5. Click Create Class. Once you do this, you'll get a pop-up saying 'Ready to add some students?' and two options to add your students.
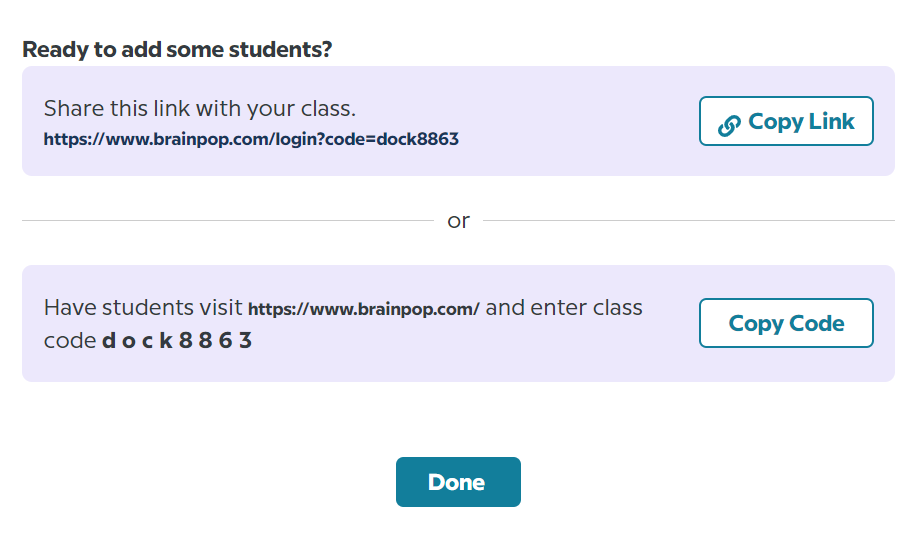
Follow the directions below to get students connected to your account.
Option 1: Creating and Linking Student Accounts with Student Link
1. Copy the link provided when creating your class.
2. Paste the link into your Schoology Course.
3. When your students log in to Schoology, they will click on the link, which will connect them to your BrainPOP class (this only needs to be done the very first time they log in).
4. Once all students have clicked on the link, delete the link from your Schoology Course.
Students are now able to log in via the LMS or learning platform without needing an additional username or password.
Option 2: Creating and Linking Student Accounts with Class Code
When your students log in through Schoology, they can expect to take the following steps:
1. They will be prompted to enter a Class Code, which you received when you set up the class as outlined above.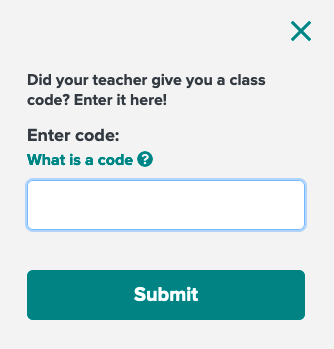
2. Enter the code and click Submit. The student account will be automatically created and linked to their LMS or learning platform login. They are now able to log in via the LMS or learning platform without needing an additional username or password.
Assigning a Feature
1. Find a topic and choose any available feature (Movie, Quiz, Make-a-Map, etc.).
2. Click the Assign button on the feature page.

3. Fill in key information about your assignment, including a title and the class that should receive it. You can also add instructions, assign to specific students, add a due date, or schedule the assignment for later if you wish.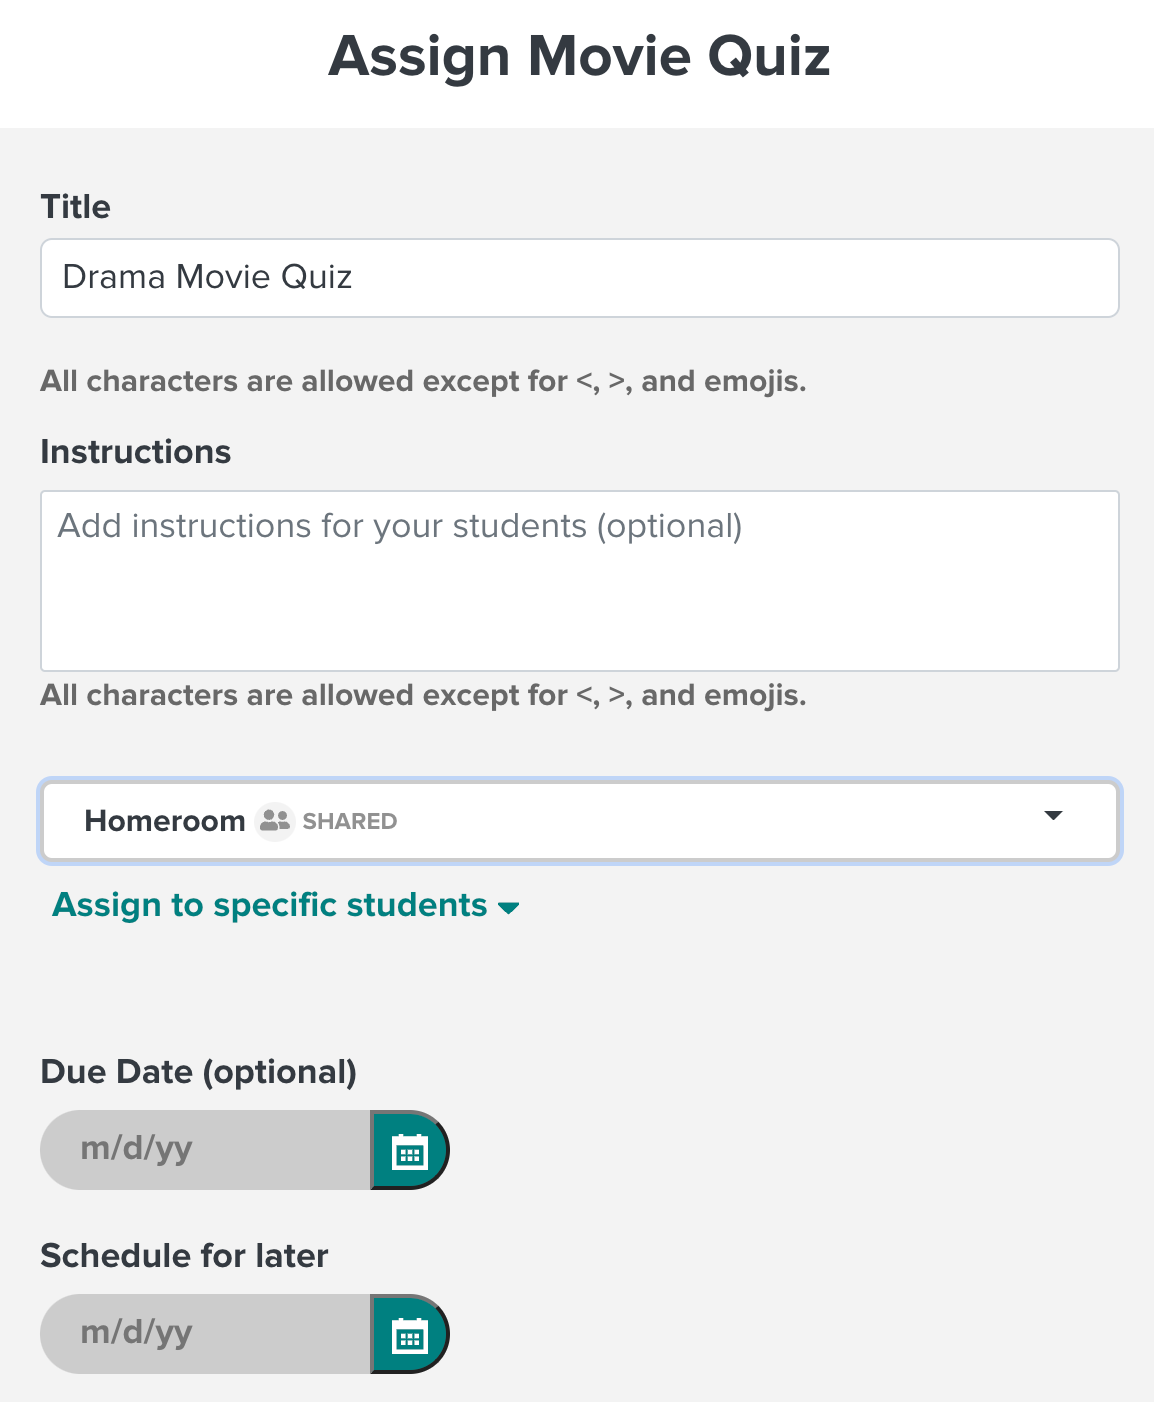
4. Click Assign to send your single-feature assignment to your students.

5. Continue to the next section of this article to learn how to add more features to your assignment.
Assigning Multiple Features
Once you have chosen your first feature as shown in the previous section, you can use the Assignment Builder to add more to your existing assignment. You can also mix and match features from different topics.
1. To add more features after you have added your first feature, click Add more features just beneath the Assign button.
2. Select the additional features to include in the assignment.
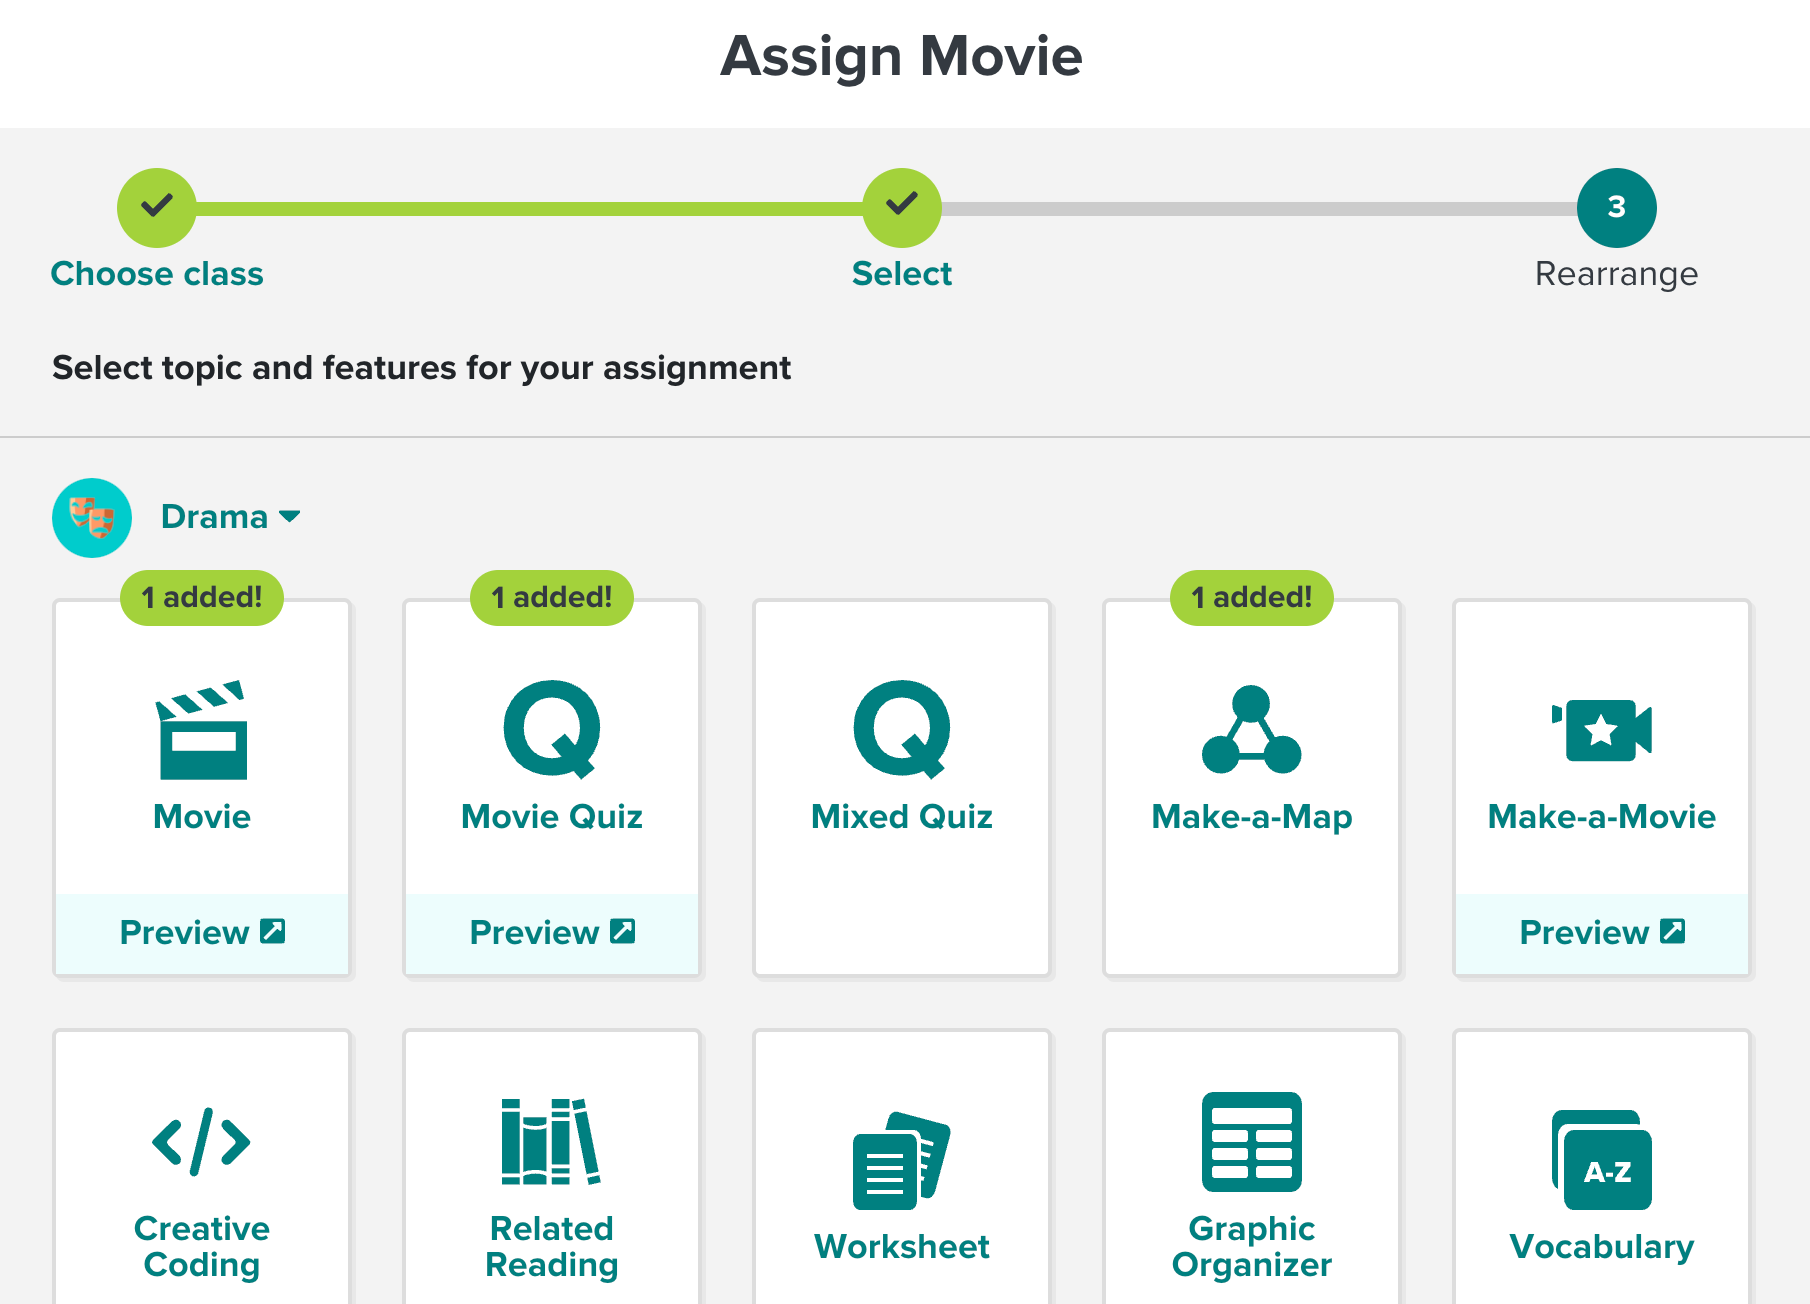
3. Clicking +
Add Topic allows you to include features from other topics.
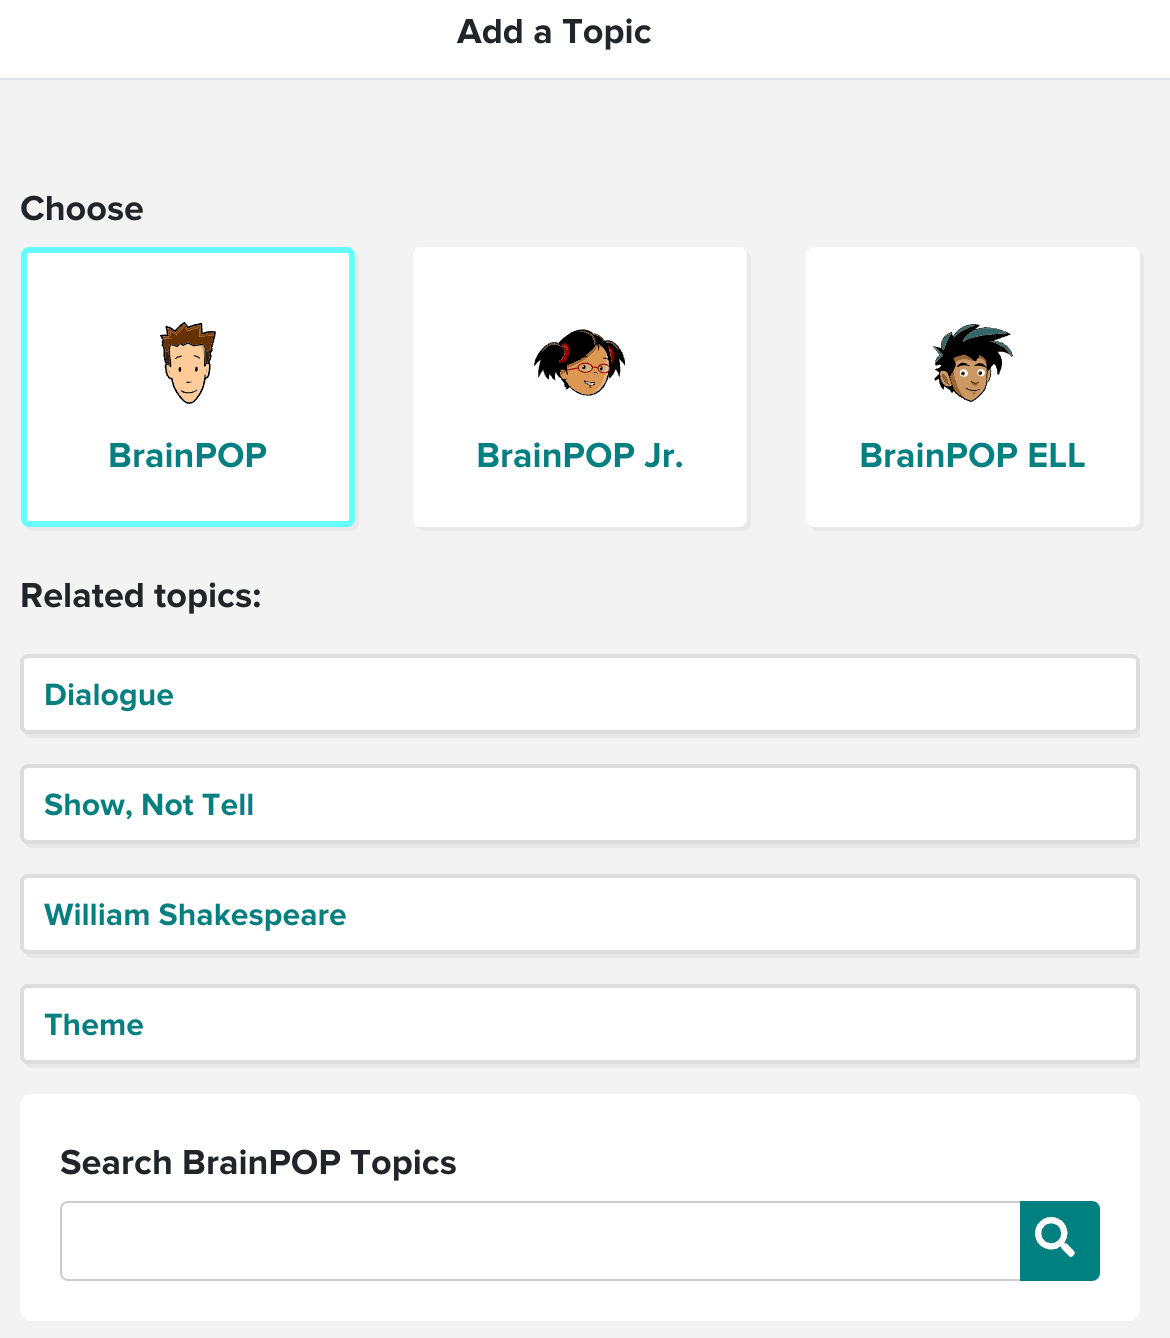
4. Click Save to update the existing assignment. Or, click Next to make further changes to the title, instructions, and order.
5. Edit key information including your assignment’s title, instructions, and feature order. To change the order of features in the assignment, click and hold the three lines next to the feature and drag it to your chosen place in the sequence.
6. When you have finished editing, click Assign to send the assignment to your students. You may also click Save to create a draft assignment that you can return to later to make further edits.
7. After you have saved or assigned your assignment, you'll have the option to View Assignment, copy a link of the assignment to post in another platform, and to Duplicate Assignment. Duplicating an assignment will allow you to use the same assignment with another class.
Assignment Builder
You may also create an assignment from scratch using the Assignment Builder. To assign this way, you'll need to know the topic(s) you're looking for in advance.
1. Go to your Teacher Dashboard and click + New assignment.
2. This will open the
Assignment Builder, where you can give the assignment a title, choose the class you're assigning it to, give it a due date, or schedule it for later.
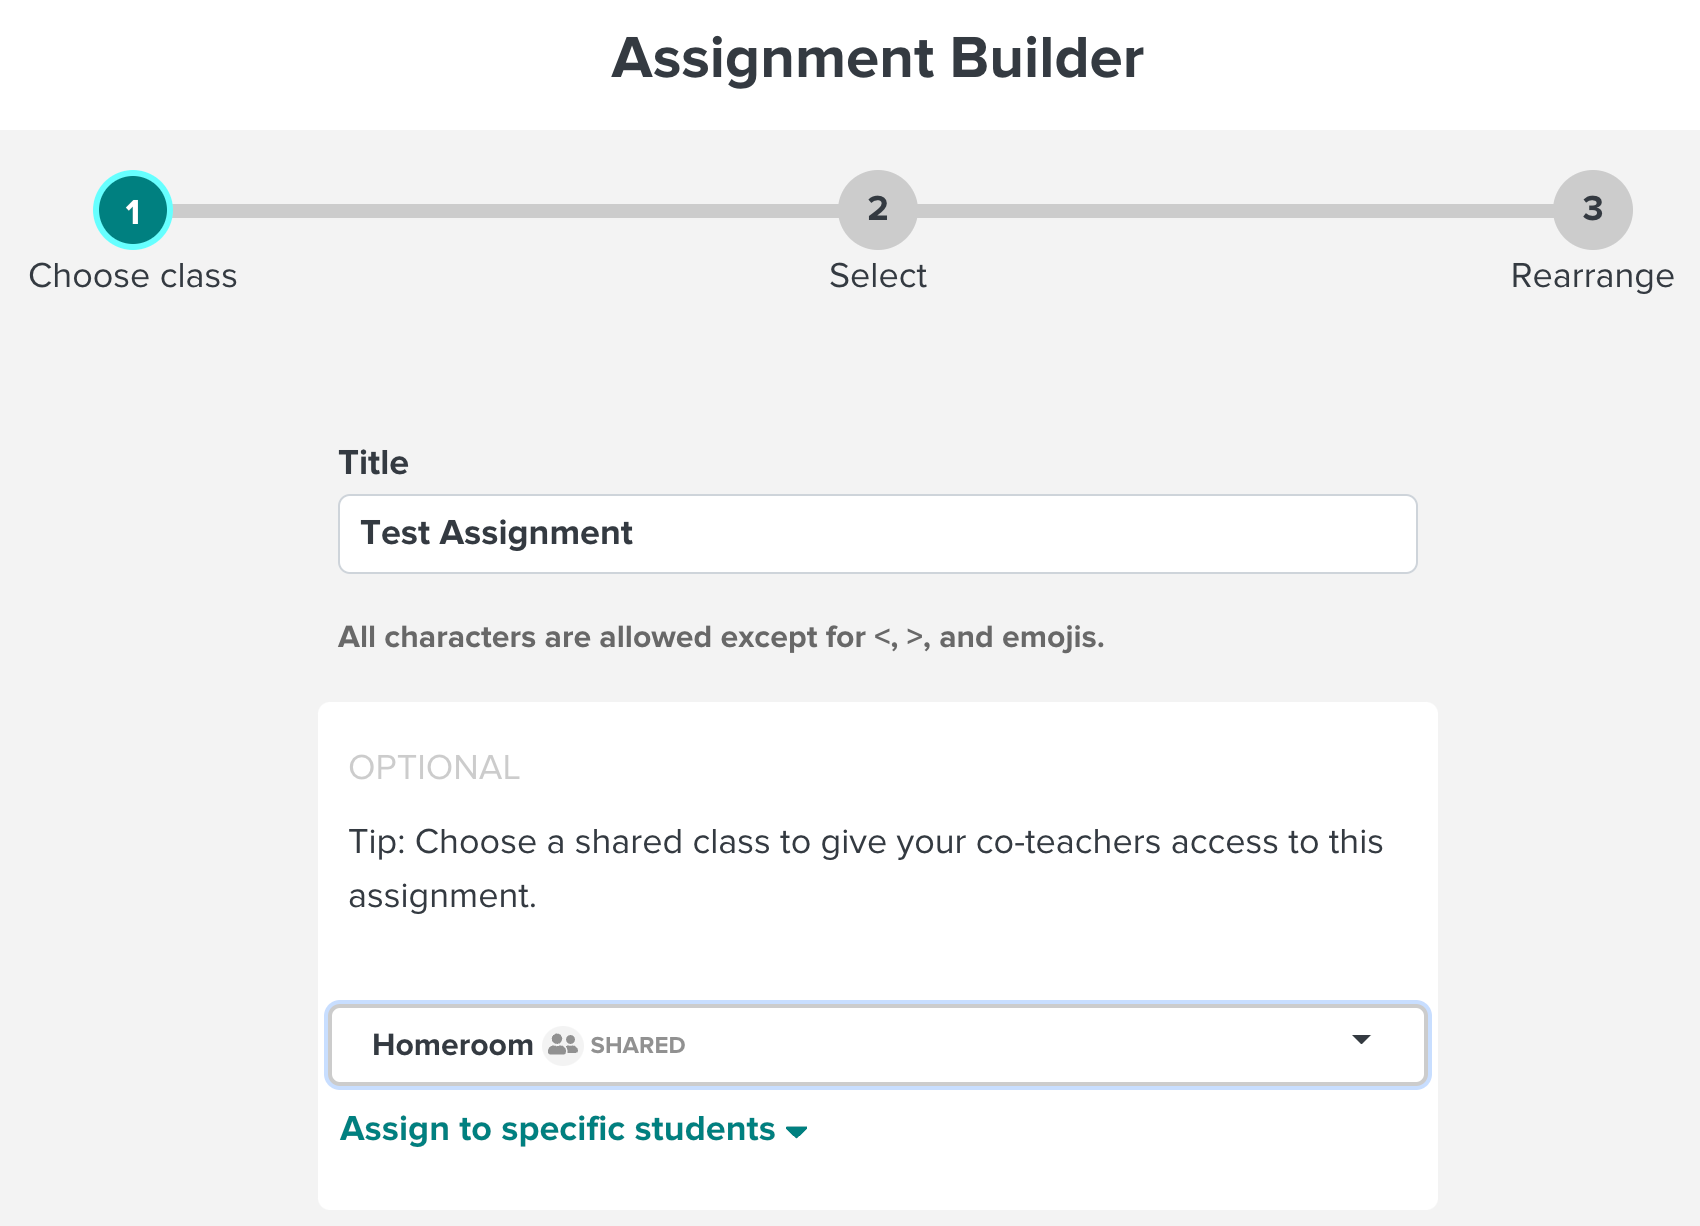
3. Click
Next to move on to choosing the topic. Click
+ Add Topic to search.
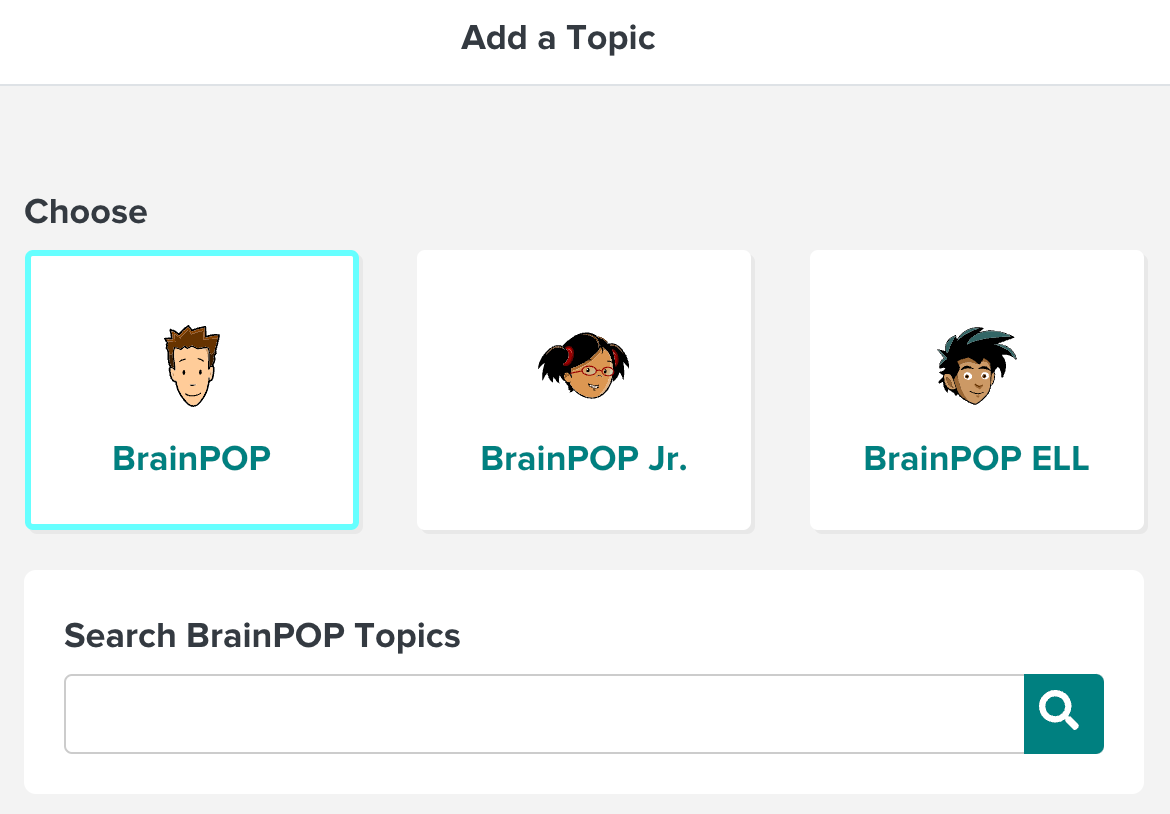
4. Once you've added the topic, you'll select the features you want to add to the assignment. You can also add another topic by clicking
+ Add Topic again.
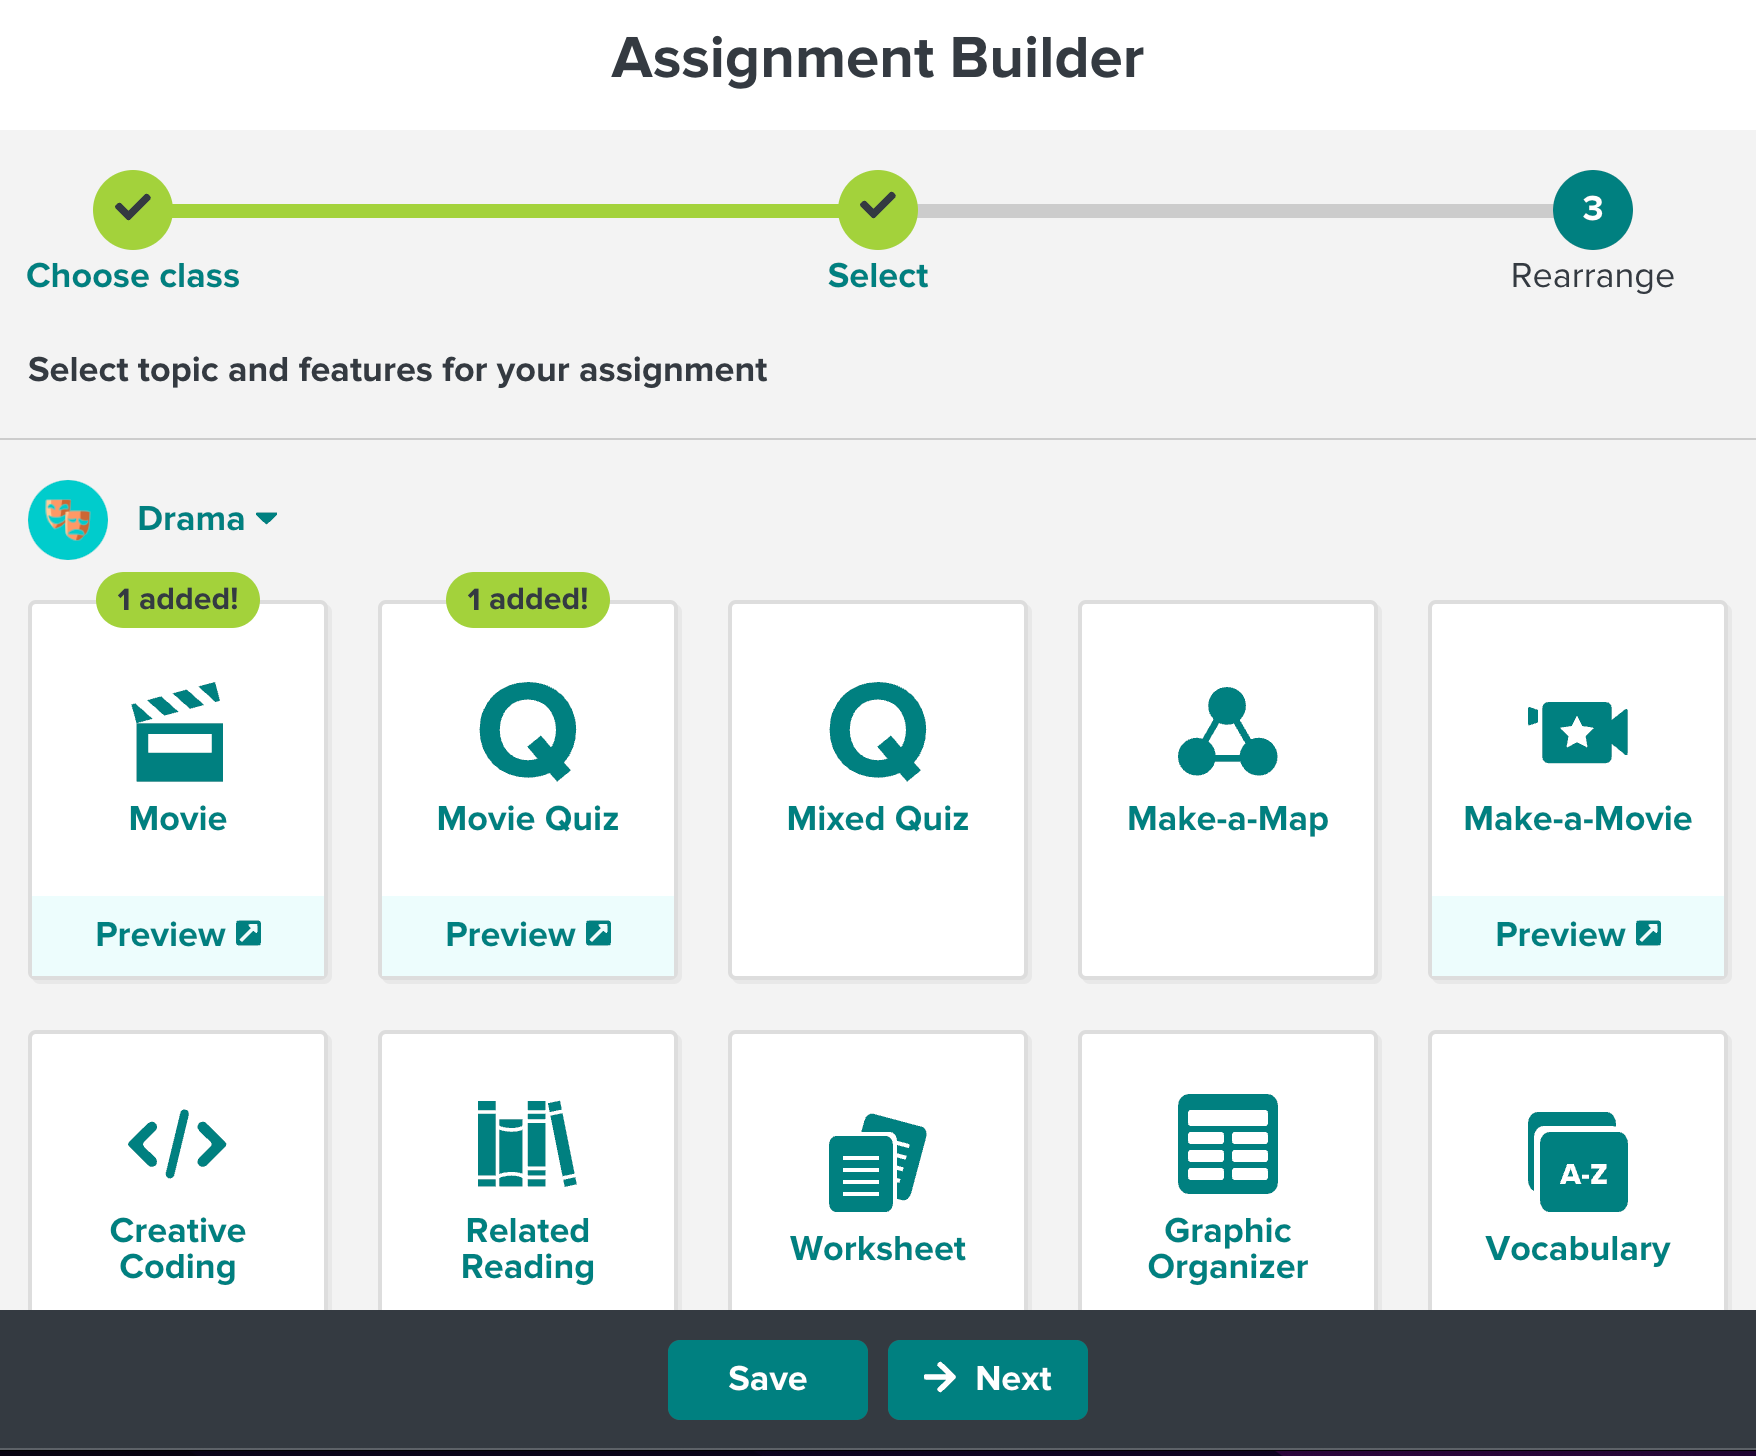
5. Click Next to finalize the assignment and add instructions or update the order of features. To change the order of features in the assignment, click and hold the three lines next to the feature and drag it to your chosen place in the sequence.
6. Click Save to create a draft of the assignment or Assign to officially assign it to the class.
View Assignments
To view your assignments, log in with your individual educator account and click
Dashboard at the top. You’ll find your most recently created assignments on
the Dashboard, but to view them all, click
All Assignments.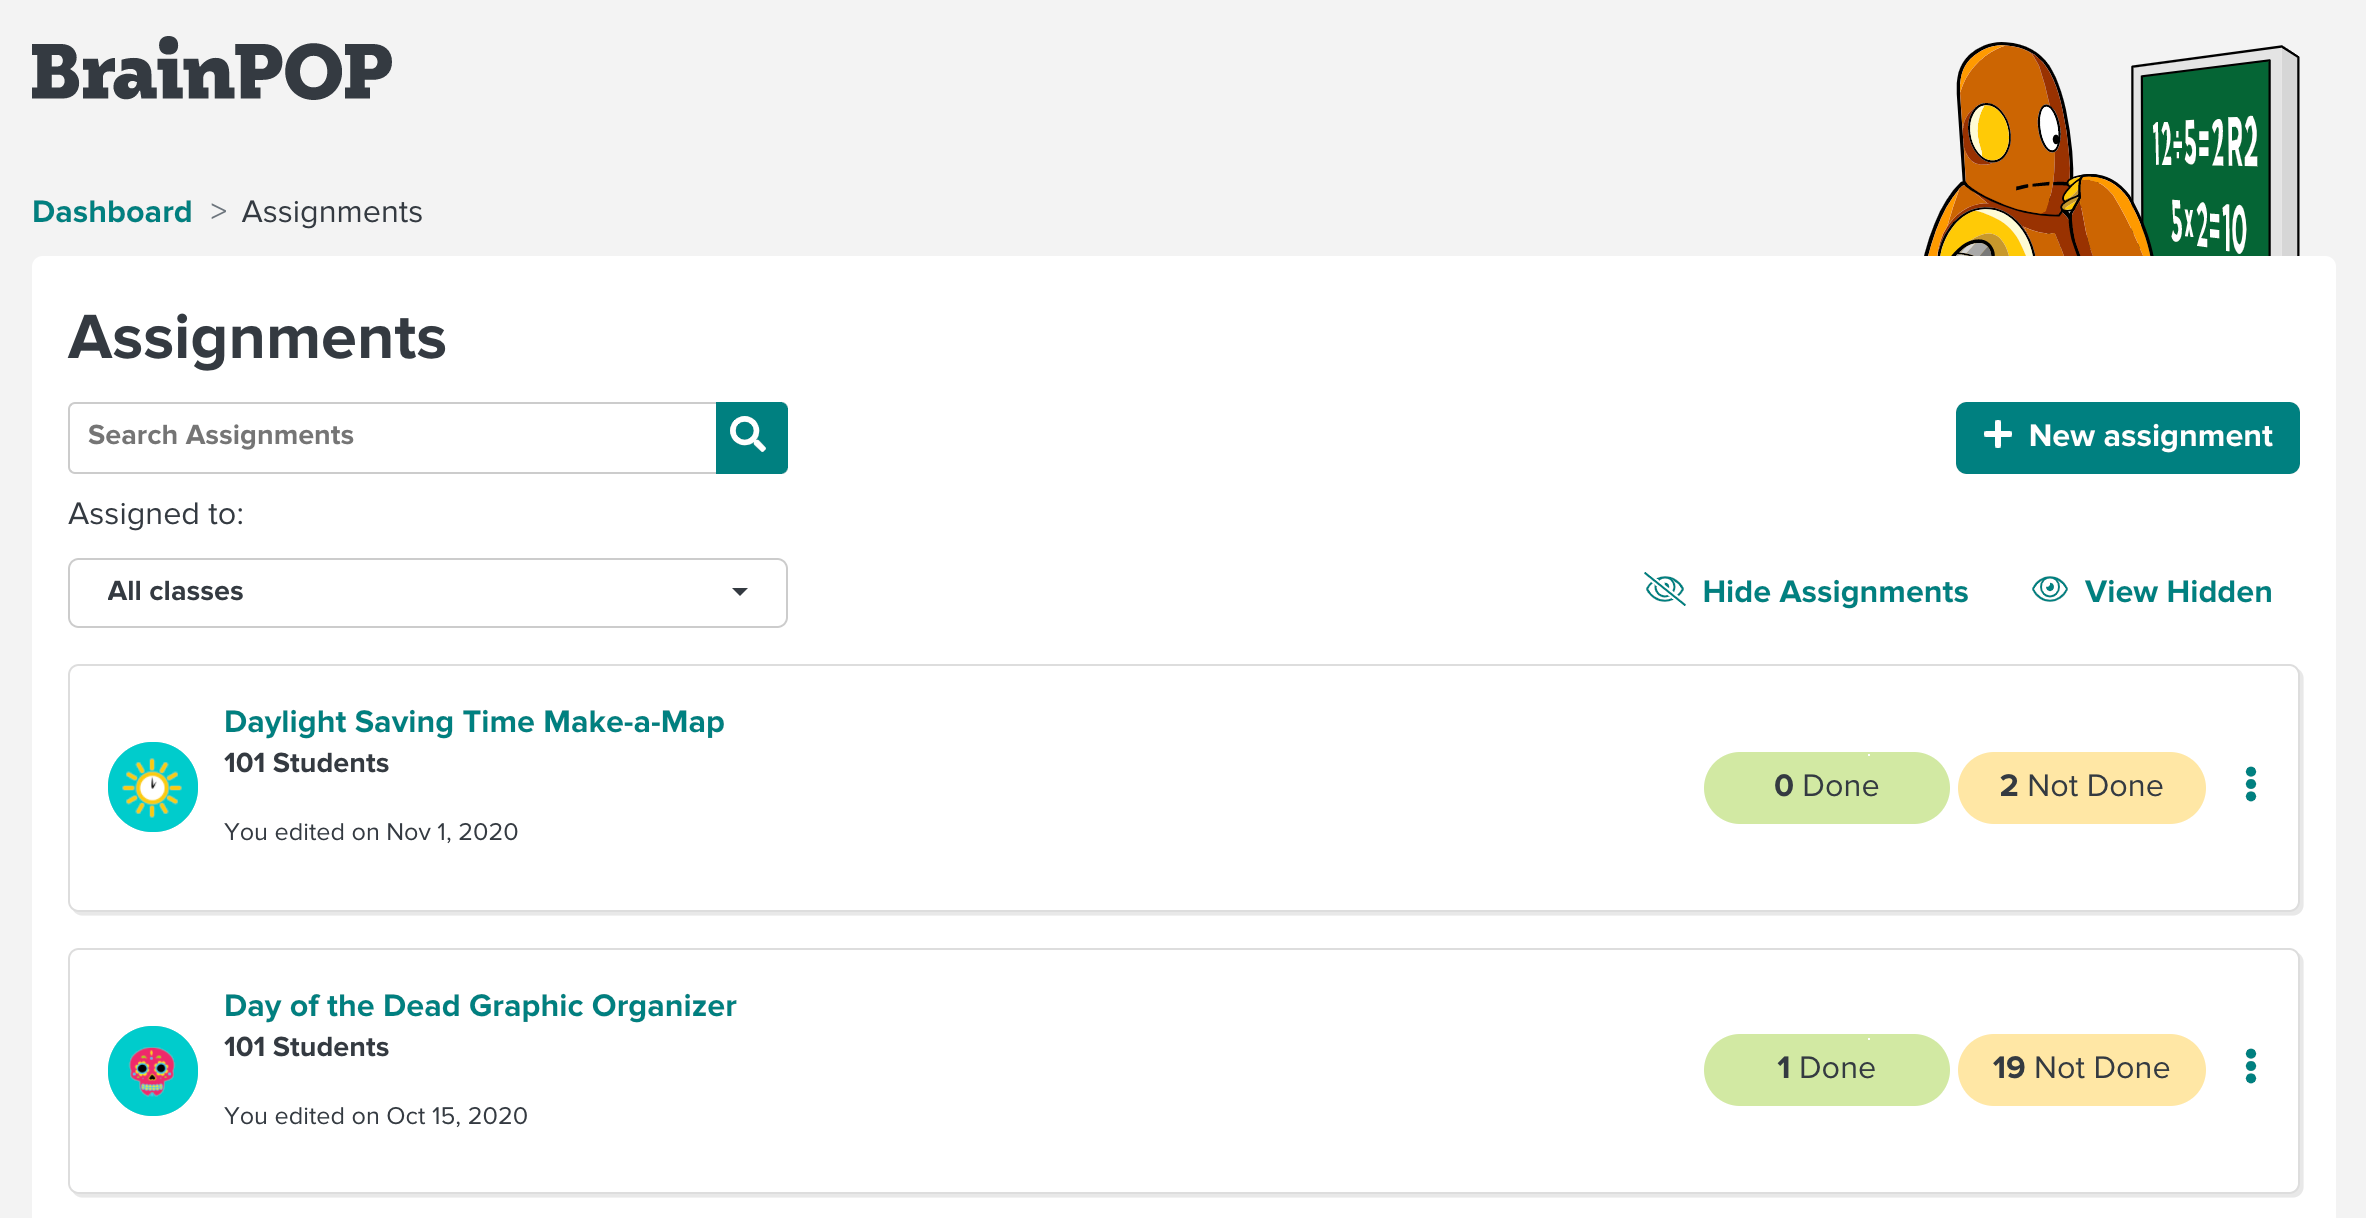
Track Progress on Assignments
1. Click an assignment’s title to view progress on the assignment. You’ll see a table listing students’ names, links to their work, and their scores.
2. If your assignment has multiple parts, you’ll see them listed in a column on the left; click a specific part to view your class’ progress on it.
Edit Assignments
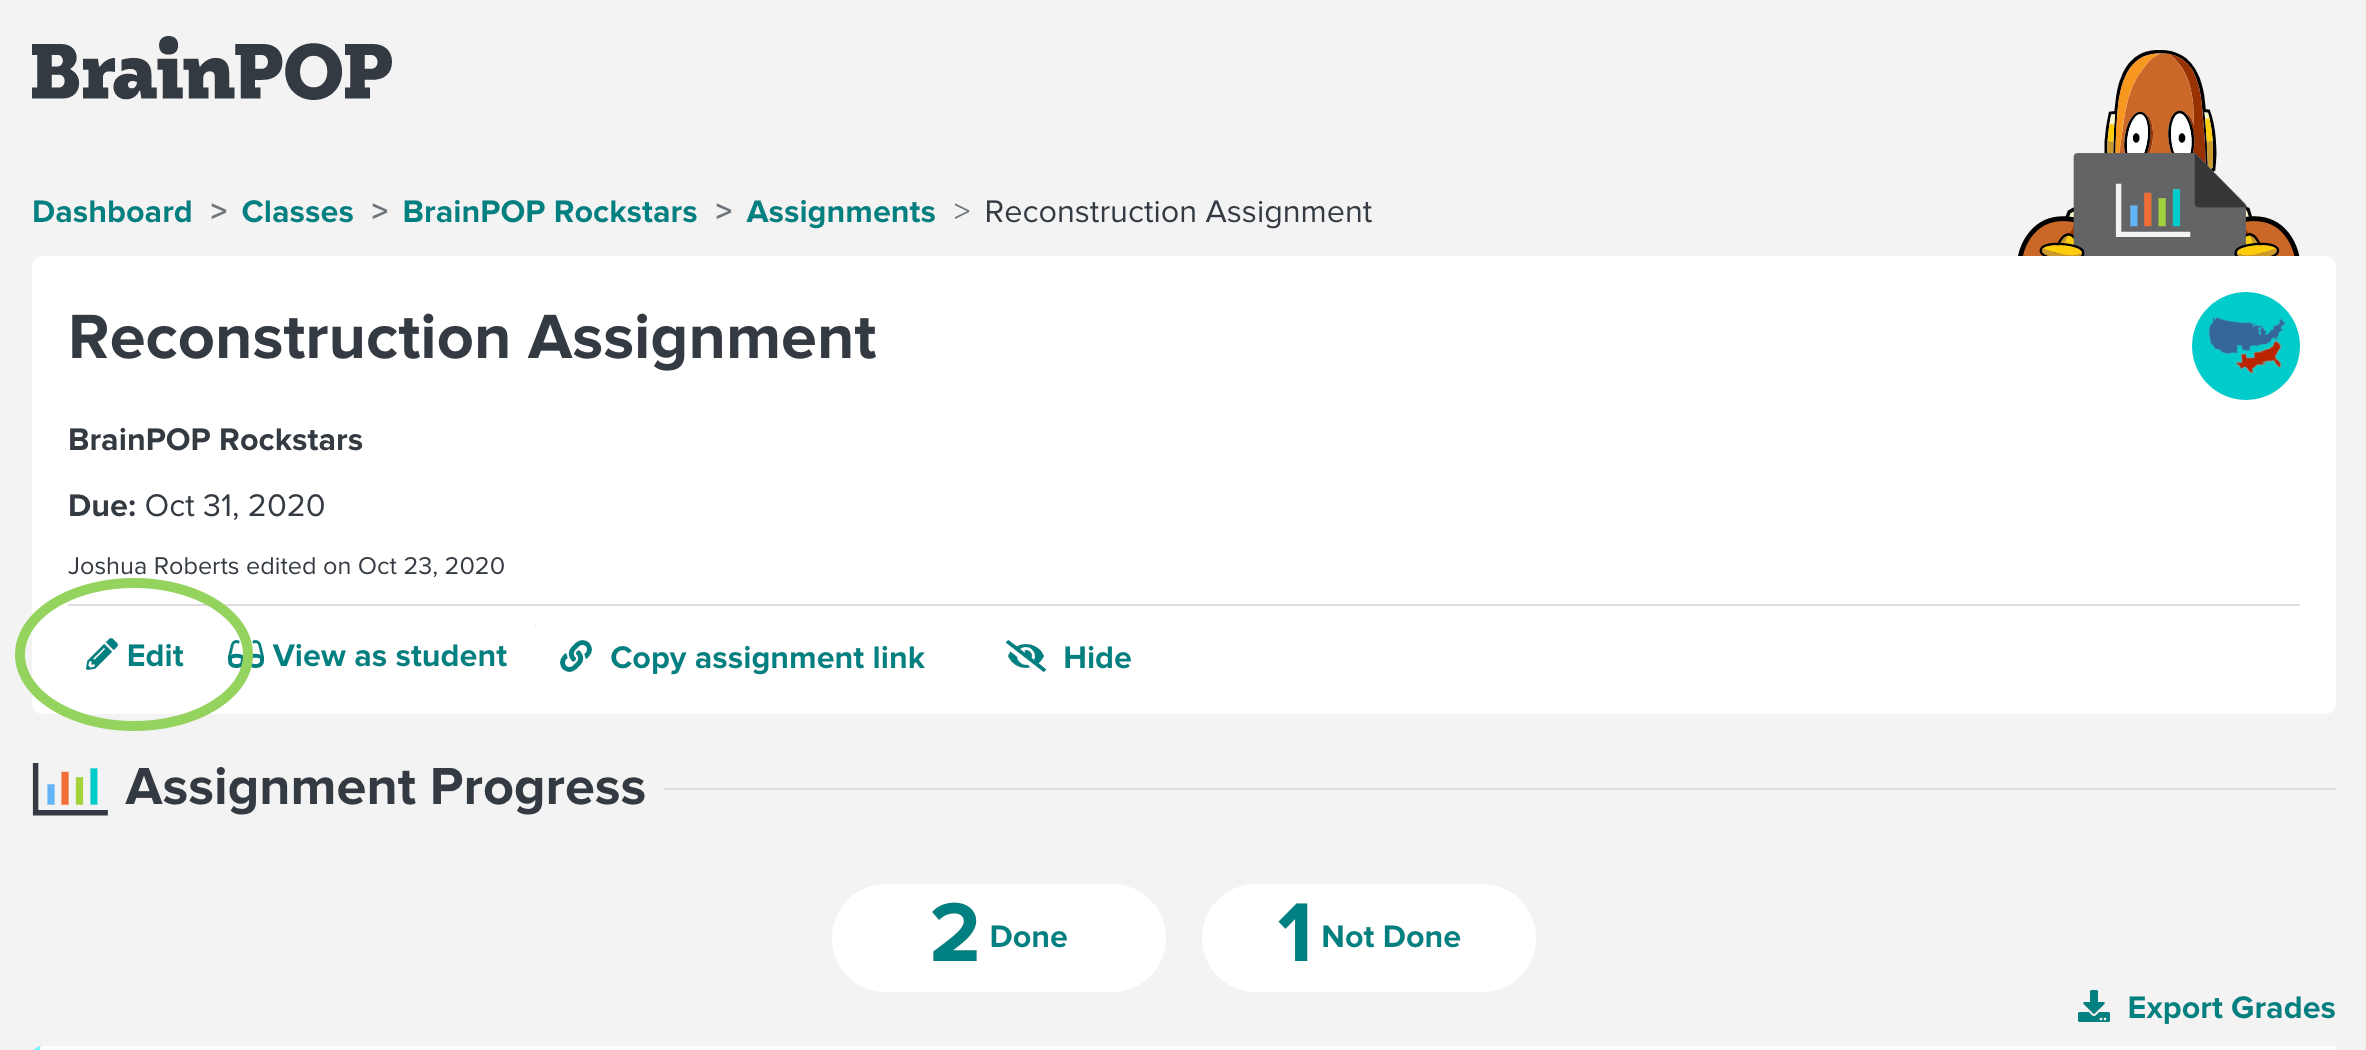
1. Click an assignment’s title in your Teacher Dashboard then click
Edit to make changes to an existing assignment.
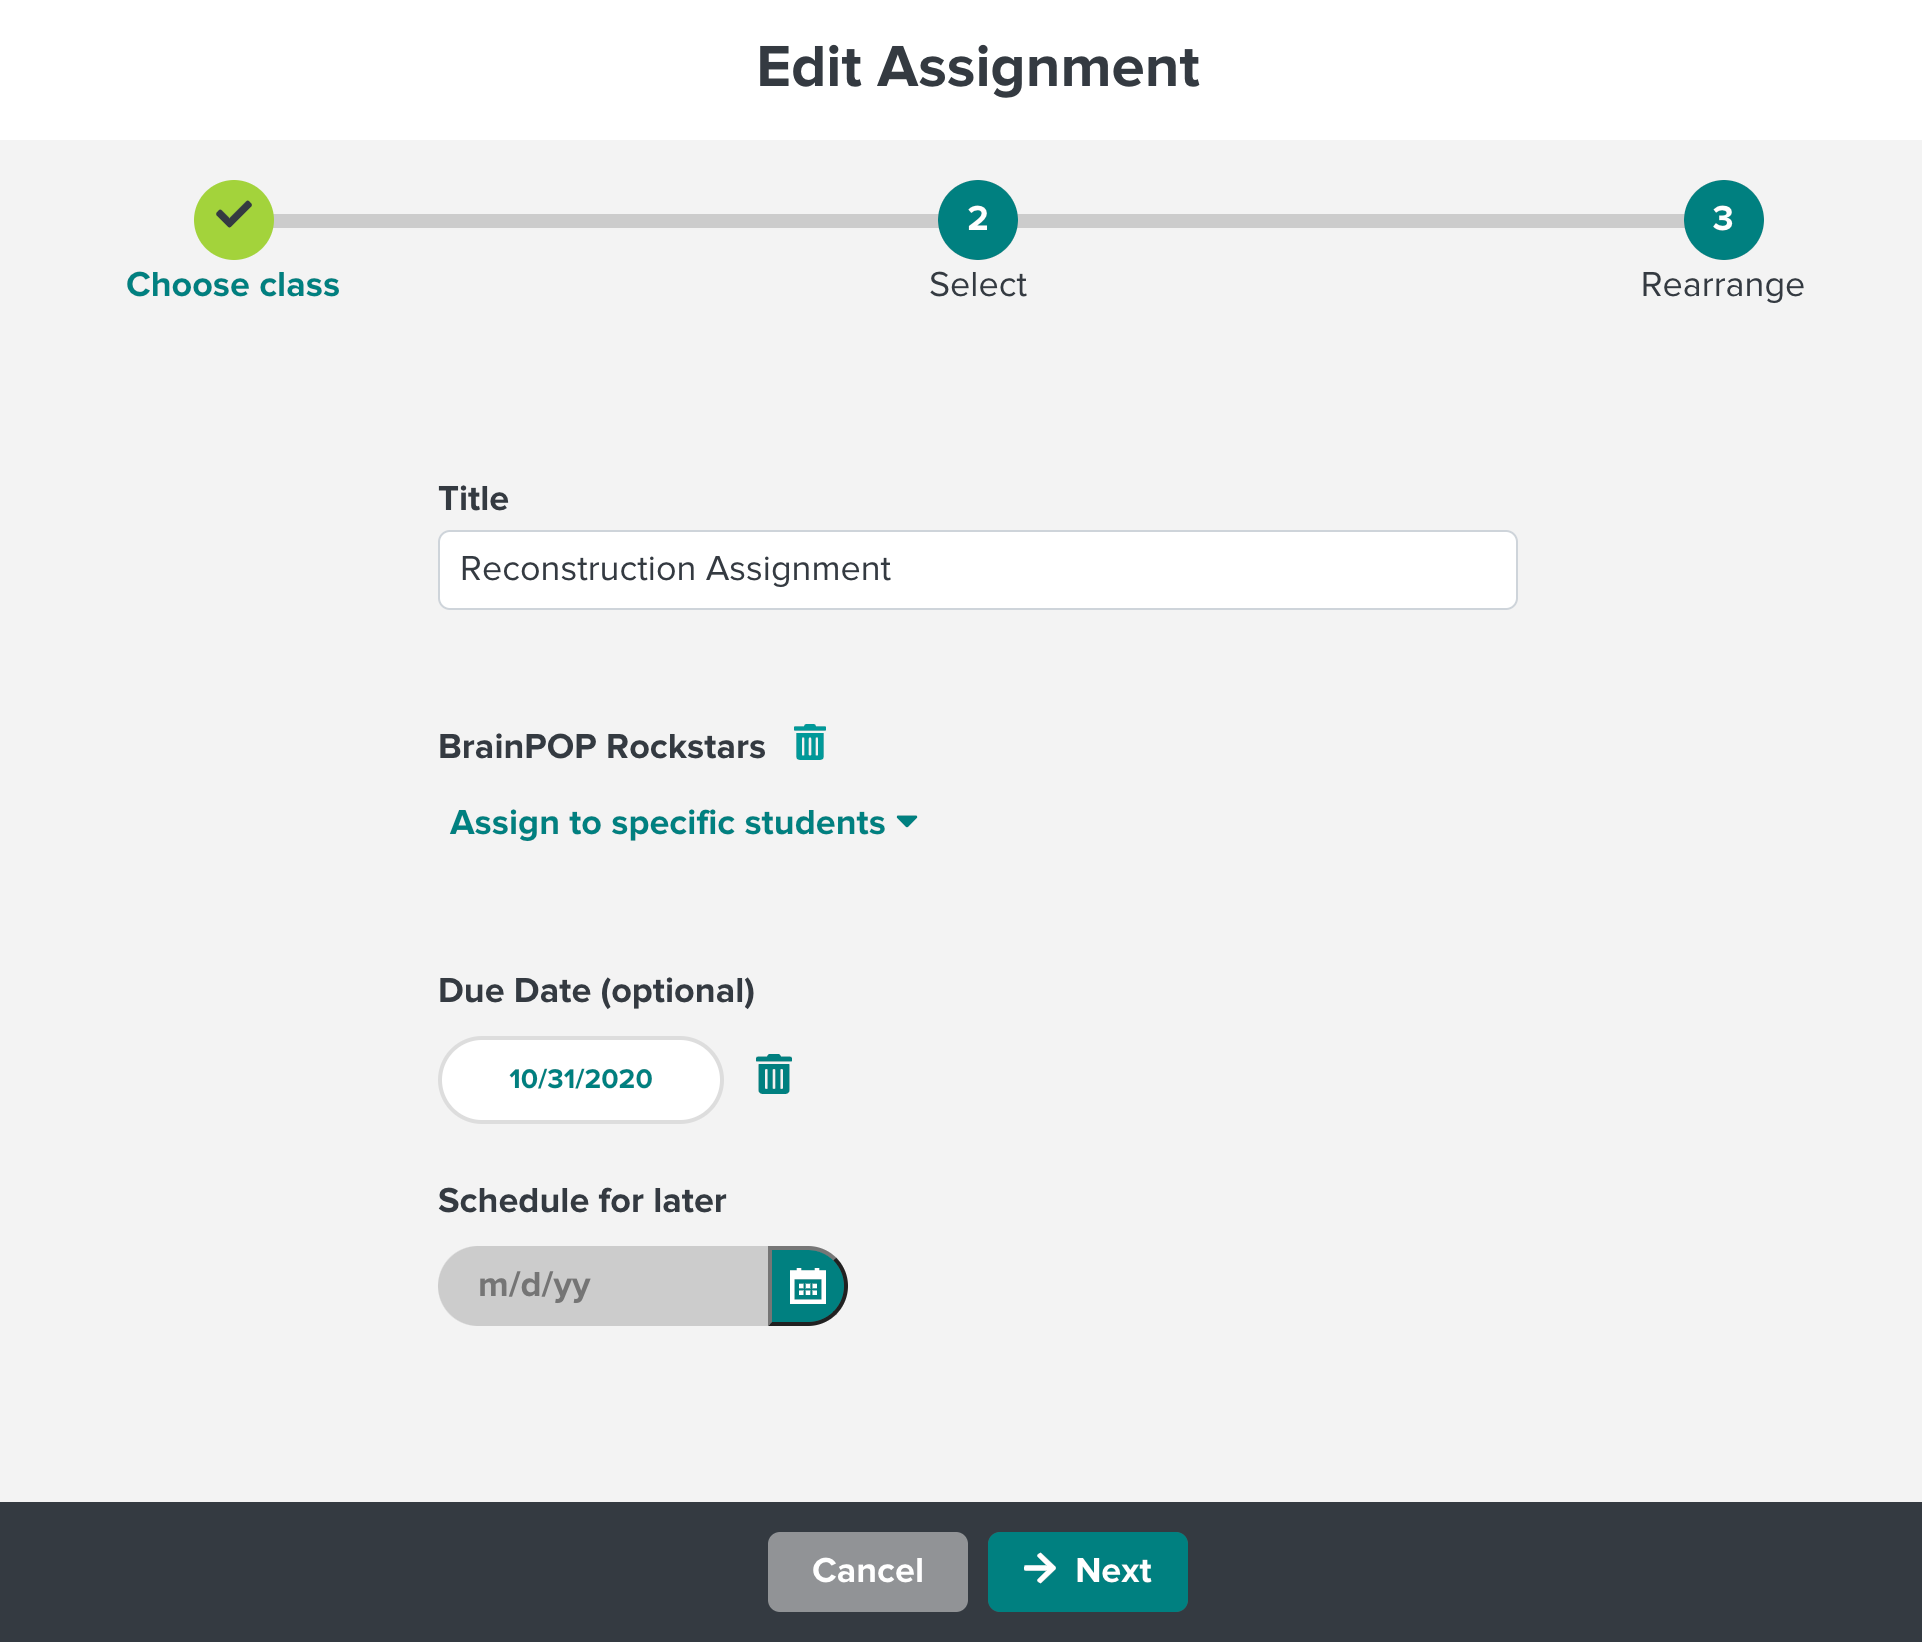
2. When you click the
Edit button, you will be brought to the first step of the
Assignment Builder page where you can edit the class the assignment is given to, update the assignment to assign it to specific students, and change the title, due date, the date it's scheduled to be assigned, and other details. When you're ready, click
Next to proceed to the second step in the Assignment Builder.
3. Here, you can add activities to your assignment
Note: Scroll down slightly, and you'll see you can also click Add Topic to include features from other topics.
4. When you are finished adding features, click
Next to proceed to the third step in the assignment builder to add instructions to your assignment or remove activities from your assignment.
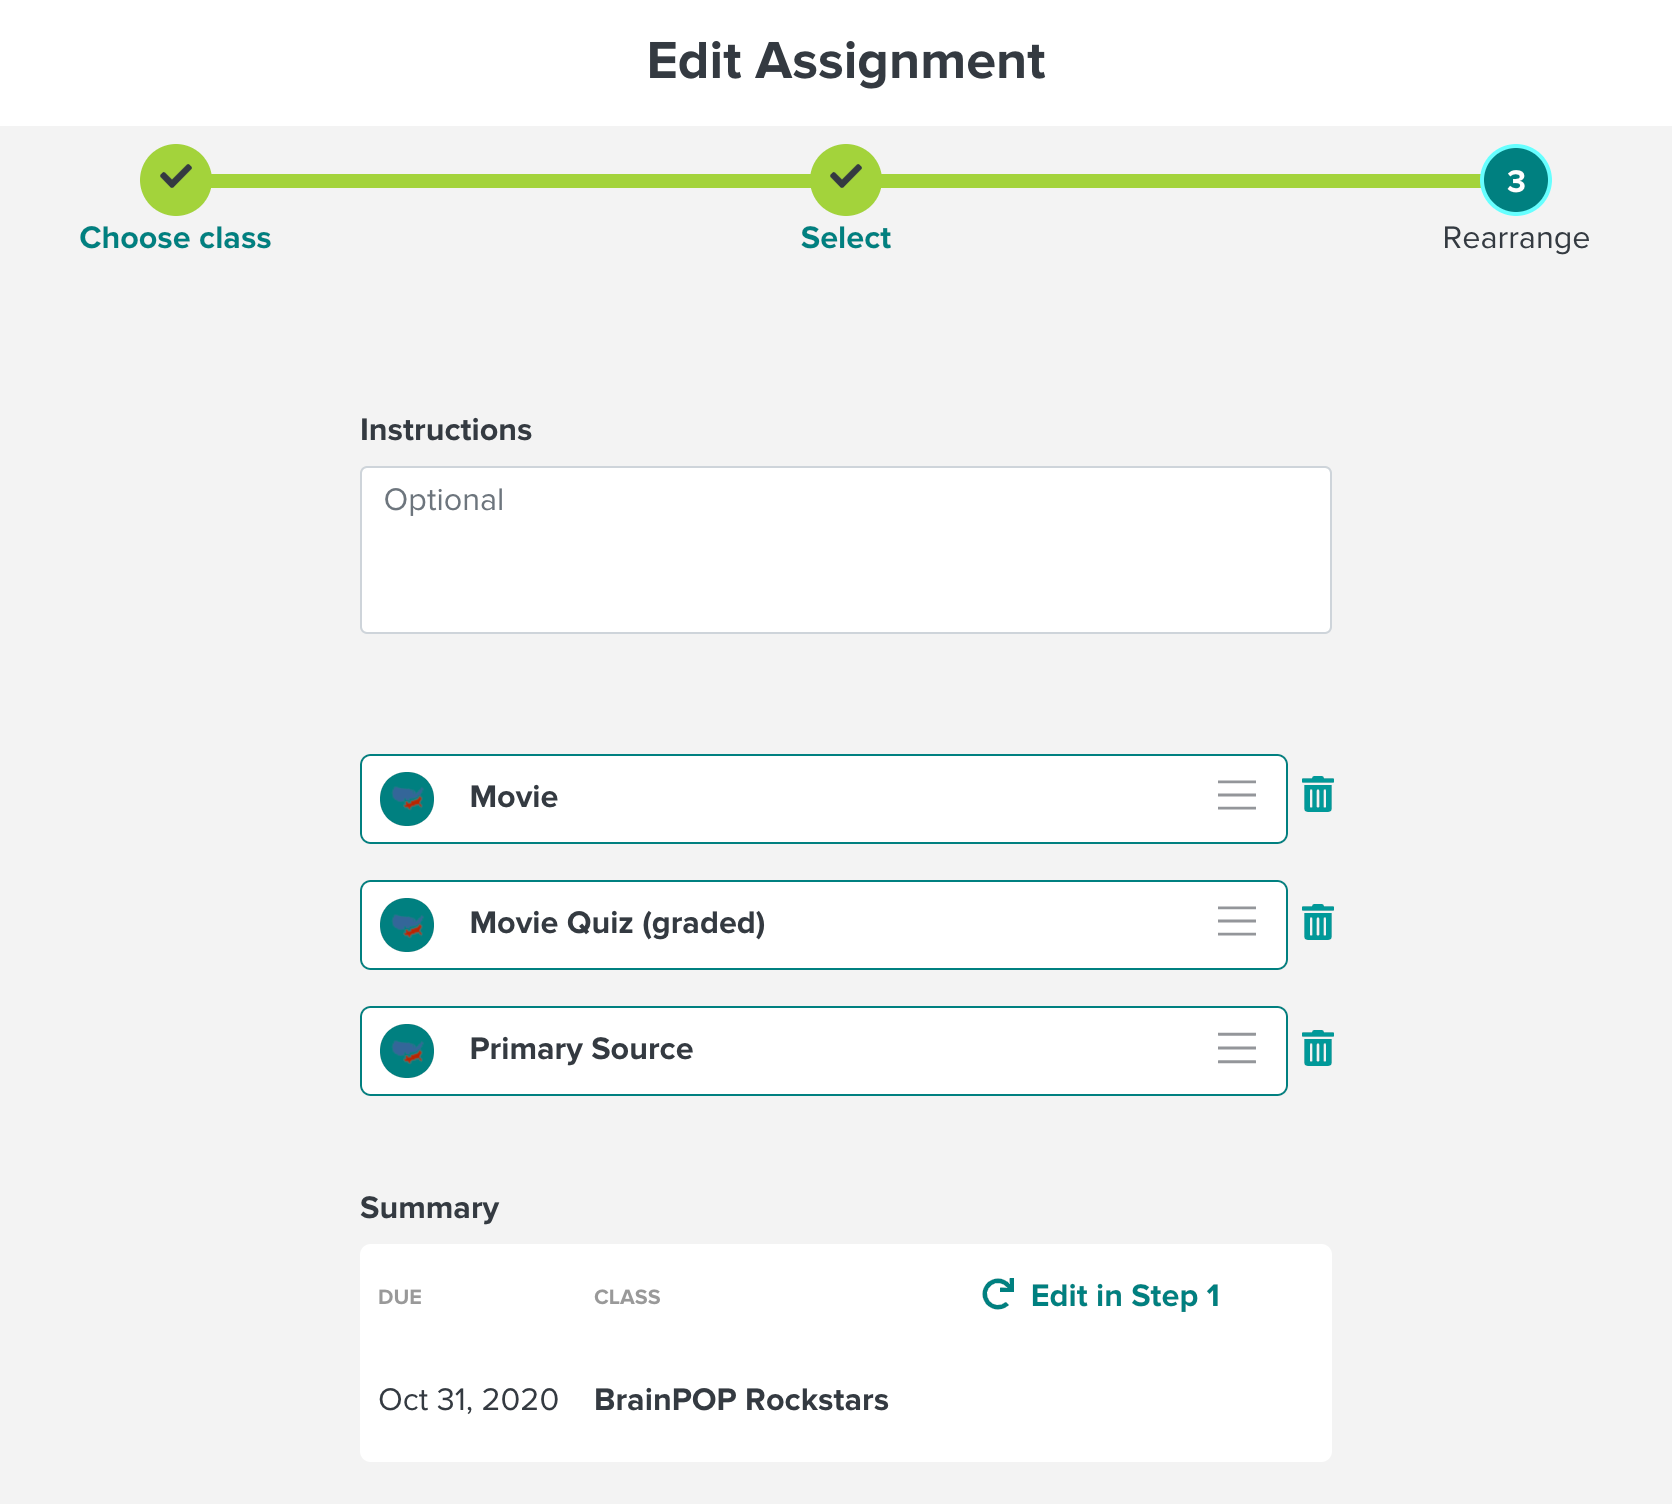
5. You can add instructions in the box labeled Instructions.
6. To remove a feature from an assignment, click on the trash can next to the activity.
7. When you are finished, click Update to save the changes made to your assignment.
Hide Assignments
1. In the Assignments view, click the three dots next to an assignment. You'll see you can
edit the assignment,
duplicate the assignment, and
copy the assignment link to paste it in your LMS. You can also
hide the assignment, which means it will be hidden from your assignments page.
Hiding an assignment will hide it from your view, but it will not delete or
unassign it. The assignment will remain visible to students, their work will remain in the assignment, and students will still be able to access the assignment.
2. You can always view the assignment again by clicking View Hidden. To see your hidden assignments, click View Hidden.
3. To unhide an assignment, click the three dots on the hidden assignment and click Unhide.
Unassign Assignments
You can unassign an assignment from the class it's assigned to, or unassign it from specific students. This will remove the assignment from the Assignments tab in the student Dashboard.
1. When viewing the Assignment list, click the three dots next to the assignment you want to unassign and click Edit.
2. To unassign it from the entire class, click the trash can icon next to the class name.
3. You'll be asked to confirm that you would like to remove the class from the assignment. To confirm, click Continue.
4. You'll return to the assignment builder. From there, proceed through the remaining steps to update the assignment. Click Next, click Next again, and click Update.
5. When you return to your Assignments, you'll see the assignment is now reverted to a draft.
6. If you need to unassign it from specific students rather than the entire class, instead of choosing the trash can icon next to the class name, simply click Assign to specific students. Then uncheck the box next to the students' names.
7. Click Next to continue updating the assignment as usual.
Any students who have had the assignment unassigned from them will no longer see it in the Assignments tab of their Dashboard. Any results from students that were previously submitted to you as part of the assignment will remain visible to you when viewing work for your class. Those will now appear as free submissions.
Free Submits
Free Submits are any assignment features completed by students outside of an assignment submitted to your class.If you are trying to locate work that a student has submitted that isn't appearing in your Assignments view, we recommend checking Free Submits to track down any work that may have been completed a different way.
Duplicating Assignments for Another Class
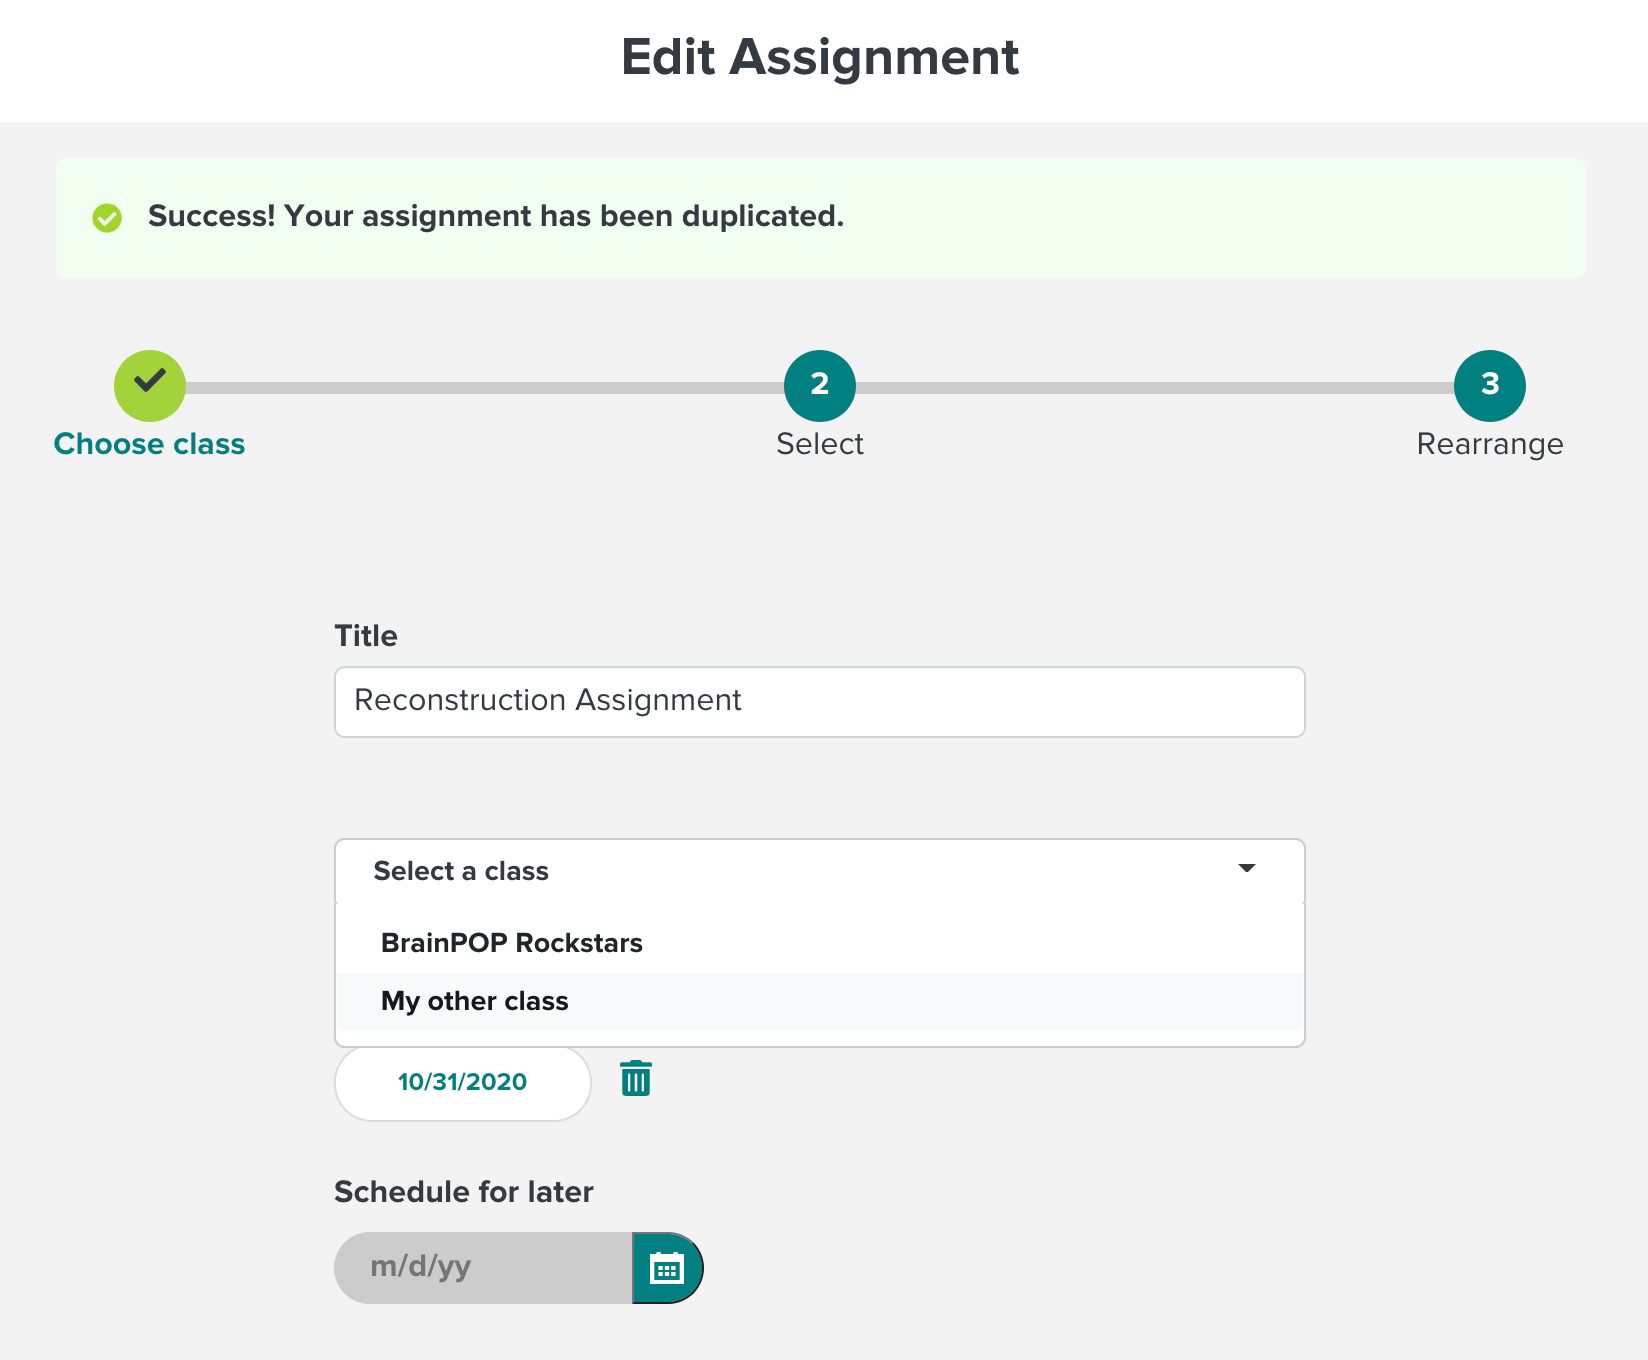
1. You can give the same assignment to more than one class. If you've just finished creating the assignment, click Duplicate Assignment.
2. If you are returning to the assignment later, click the three dots next to the assignment and then click Duplicate.
You'll see that the assignment was duplicated successfully and you can choose a new class to assign it to.
Grade and Give Feedback
1. You can give comments and scores on most work students have submitted to you. Click an assignment straight from the Dashboard or click the title of a feature or assignment from the class page. You’ll see a table listing your students with links to their work. This page also includes an Export Grades link to download a CSV of scores for the entire assignment.
2. Click View Work next to a student’s name. You’ll see the student’s submission, along with a field to leave optional feedback and a numerical score. (Note: The feedback feature is not available for movies and quizzes.)
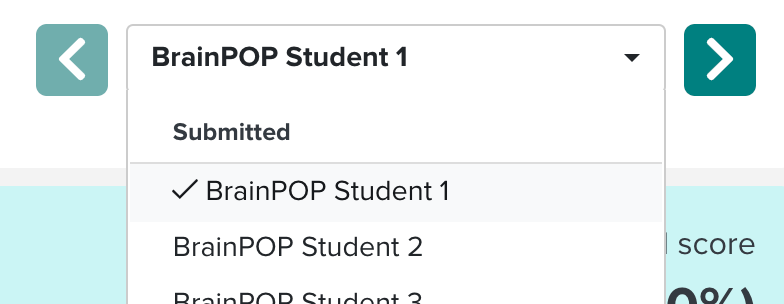
3. You can use the dropdown menu of students’ names to navigate directly to their submissions and leave feedback, or use the arrows next to the student name to move on to the next student or back the previous one.
Frequently Asked Questions
CAN I DELETE OLD ASSIGNMENTS FROM MY TEACHER DASHBOARD?
You cannot delete assignments while they are assigned to a class, but you can hide them instead. You can also delete assignment drafts. If you truly need to delete an assignment entirely after it has been given to the class, you can turn it back into a draft by unassigning it. Then you can click the three dots next to the draft and click Delete.
Can I delete a student's assignment results when viewing a particular assignment?
You cannot delete a student's assignment results. The assignment results will only show the original score for the student's submission to the assignment.
CAN I REASSIGN AN ASSIGNMENT FOR A STUDENT TO RETAKE IT?
If you'd like a student or students to repeat an assignment, we recommend
duplicating the assignment and assigning it to the specific student or students.
IF I ASSIGN A STUDENT WORK, BUT THEY SUBMIT THE WORK TO ME AGAIN AFTER THEY ORIGINALLY SUBMITTED THEIR ASSIGNMENT, WHERE CAN I SEE THOSE RESULTS?
The Assignment View and CSV download will only include the student's original score or results for the assignment. In the event that the student completes the activities again, you can find their results by going to view all work in that class, then viewing work by the activity, and looking for the fee submissions, rather than the assignments.
WHAT IF MY STUDENT DID NOT RECEIVE THE ASSIGNMENT?
If for some reason a student does not receive an assignment, you can assign it after the fact by editing the assignment itself. To do this, go to the Teacher Dashboard, click on the three dots next to the assignment, and click Edit.
Click Assign to specific students and select the student(s) who are missing. Then, click Update. The student(s) should now have the assignment.
