Microsoft Learning Activities is a tool that helps you study effectively. It allows you to access flashcards that teachers have created for you to practice information learned in class or for you to create flashcards of your own, using AI to turn your class materials, like notes, readings, or summaries, into interactive flashcards for review. Instead of just rereading information, you get to actively practice, which makes learning more engaging and helps ideas stick.
Please follow these instructions to utilize Microsoft Learning Activities:
Teacher-Created Flashcards
1. Click on the flashcard link your teacher provided you in your Schoology Course.
2. If prompted, log into your Microsoft 365 account.
Once the flashcards load, you can interact with them for practice. If the lightbulb icon is visible, you can click it to see a hint (if this option was turned on). You can also see what number flashcard you are on and see how many flashcards you have gotten correct or incorrect.
3. To answer a flashcard, you can interact with it by clicking on the answer you believe is correct. It will show you the answer you selected. To confirm your selection, click the green checkmark. To choose another selection, click on the red X, then select your new choice. If will let you know if your choice was correct or incorrect by flashing, I know this! or Still learning! on the screen and marking it on the right-hand side of the flashcards. Some flashcards will have a word on the front and the definition on the back. Click the flashcard to see the definition. You can click the checkmark or X to self-report if you knew it or not.
Once you have completed going through the set of flashcards, you will receive data on how you did, as well as opportunities for continued practice.
4. Click on the insights (graph) icon to see more detailed information regarding the time it took you to complete the flashcards, the percentage of flashcards you know, and the percentage of flashcards you are still learning.
If you scroll down, you will see the specific information marked with if you know it or if you are still learning it.
Creating Flashcards for your Own Practice
2. Click on All apps listed on the right of the Apps section.
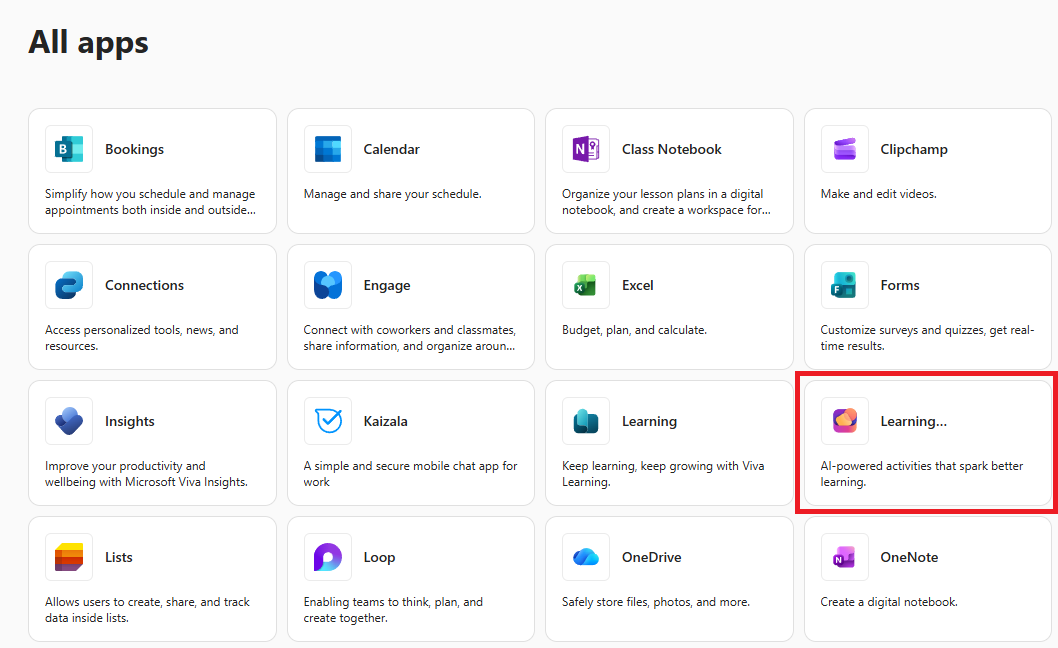
3. Click on Learning Activities. Please note that you may only see Learning... but if you hover over it, it will display the full name.
On the main landing page, you will be able to navigate to Recent (access any flashcards you recently created), My activities (access all flashcards that you have created), and Bookmarks (quickly access any flashcards that you have bookmarked). On the right-hand side you can click on + New flashcards to begin creating flashcards or # Join to view flashcards that were created.
4. To begin creating flashcards, click + New flashcards.
5. You can copy and paste content to use for your flashcards into the text box, or you can click Add content, select Cloud files or Upload file and select the files you want to use. You can upload files such as class materials, like notes, readings, or summaries.
6. The language will default to English automatically. If you want the flashcards to be in another language, then click the Language drop-down menu and select the language you want to use.
7. Click the checkbox next to the Flashcard type to select the type(s) of flashcards you wish to create. You can select more than one option.
8. Check the Generate hint for each card checkbox if you want to include a hint with each flashcard. Uncheck this if you do not want it included.
9. Click Generate.
This will generate a list of information that will be included on the flashcards. It will take a few minutes to complete the generation process.
10. On the right of the list is an AI enhancement tool. Use this to help change information you want to adjust on the flashcards and then click Regenerate all.
11. Click the Edit (pencil) icon next to the title to change the name of your flashcards. After you type the new name, click Save.
12. Click the Play (triangle) icon to preview the flashcards.
It will inform you that you are in Preview mode.
As you interact with the flashcards, you can click the lightbulb icon to see a hint (if this option was turned on), see what number flashcard you are on, and see how many flashcards you have gotten correct or incorrect.
To answer a flashcard, you can interact with it by clicking on the answer you believe is correct. It will show you the answer you selected. To confirm your selection, click the green checkmark. To choose another selection, click on the red X, then select your new choice. If will let you know if your choice was correct or incorrect by flashing, I know this! or Still learning! on the screen and marking it on the right-hand side of the flashcards. Some flashcards will have a word on the front and the definition on the back. Click the flashcard to see the definition. You can click the checkmark or X to self-report if you knew it or not.
To exit Preview mode, click Exit preview mode in the upper right-hand corner.
13. Click Save activity to save your flashcards.
You will now be able to access this set of flashcards at any time within the app.