Please Note: We are utilizing the free version of PowerBuddy, so there is a limit of uses for this product.
To utilize PowerBuddy in Schoology, please follow these steps:
1. Choose Add Materials from your course, and then select either Add Assignment or Add Discussion.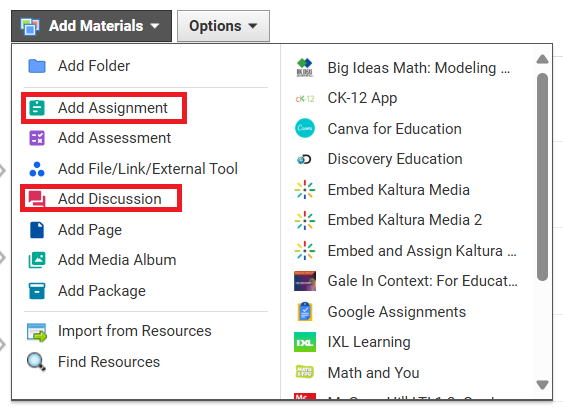
2. Click the PowerBuddy Generate content button in the text editor.
3. Choose the PowerBuddy tool that best describes the content you want to create.
4. Enter the necessary details or choose from the content criteria. Ensure you enter text or make a selection for all required fields.
5. Click Generate.
The AI generated content will preview on the right-hand side.
You can change any details and regenerate the content by clicking Regenerate.
6. Optionally, you can click Change anytime to return to the tool selection and choose another tool.
7. To edit the generated content, click the Pencil icon.
Edit any information you want to change and then click Done editing.
8. Click the Copy icon to copy the content (to paste into another application) or click Insert to insert the content directly into the Schoology Assignment or Discussion.